🍽️
Prep time25 mins
Cook time20 mins
Ingredients9
bakingmedium
Pretzel Focaccia (Chewy, Salty, No-Knead)
Published: Jan 15, 2025
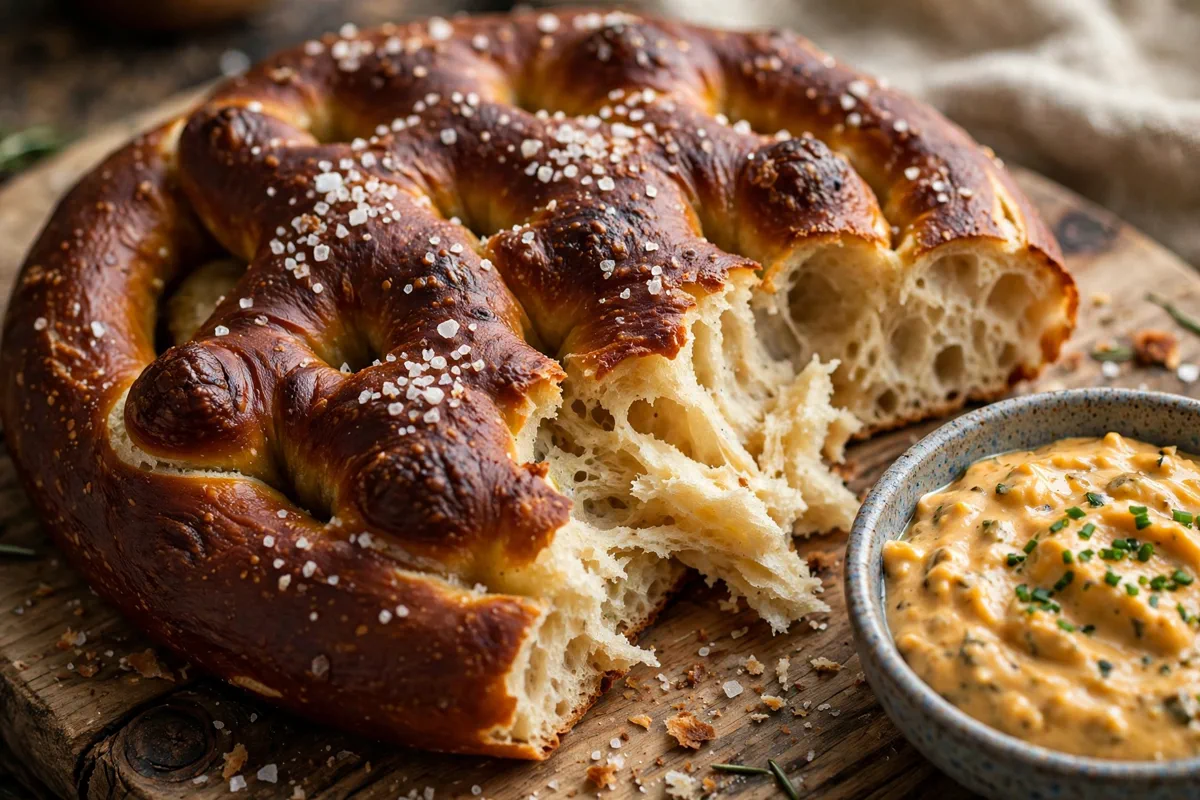
Chewy no-knead focaccia gets the soft-pretzel treatment: a baking-soda wash, coarse salt, and deep dimples. Crisp mahogany crust, airy crumb.
Chewy no-knead focaccia gets the soft-pretzel treatment: a baking-soda wash, coarse salt, and deep dimples. Crisp mahogany crust, airy crumb.
If you are looking for an ultra-satisfying, restaurant-quality meal that comes together with minimal effort, this Pretzel Focaccia (Chewy, Salty, No-Knead) is about to become your new favorite. Everything is cooked to juicy, golden perfection with wholesome ingredients and incredible depth of flavor.
One simple tip!
Mix the dough wetter than you think is right. A slack, sticky dough is what gives focaccia its open, airy holes. If the dough feels firm and neat, you did not add enough water.
Step-by-Step Photos
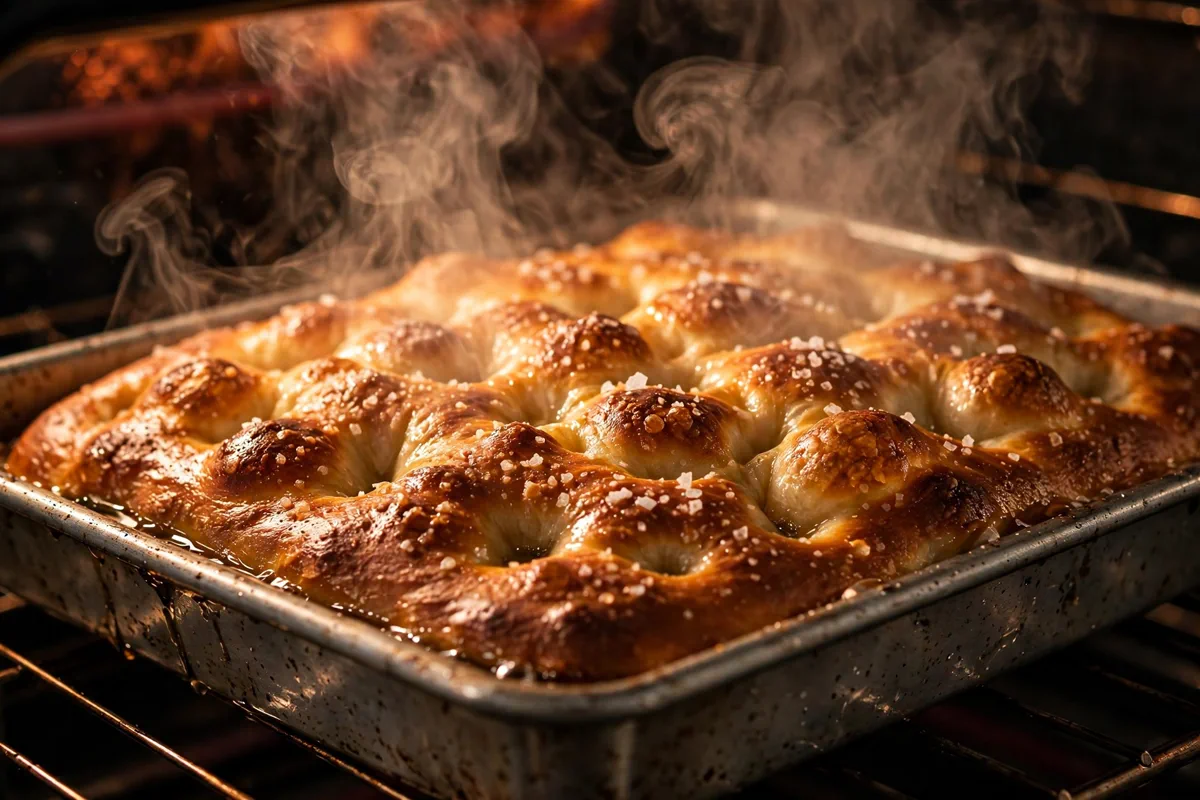
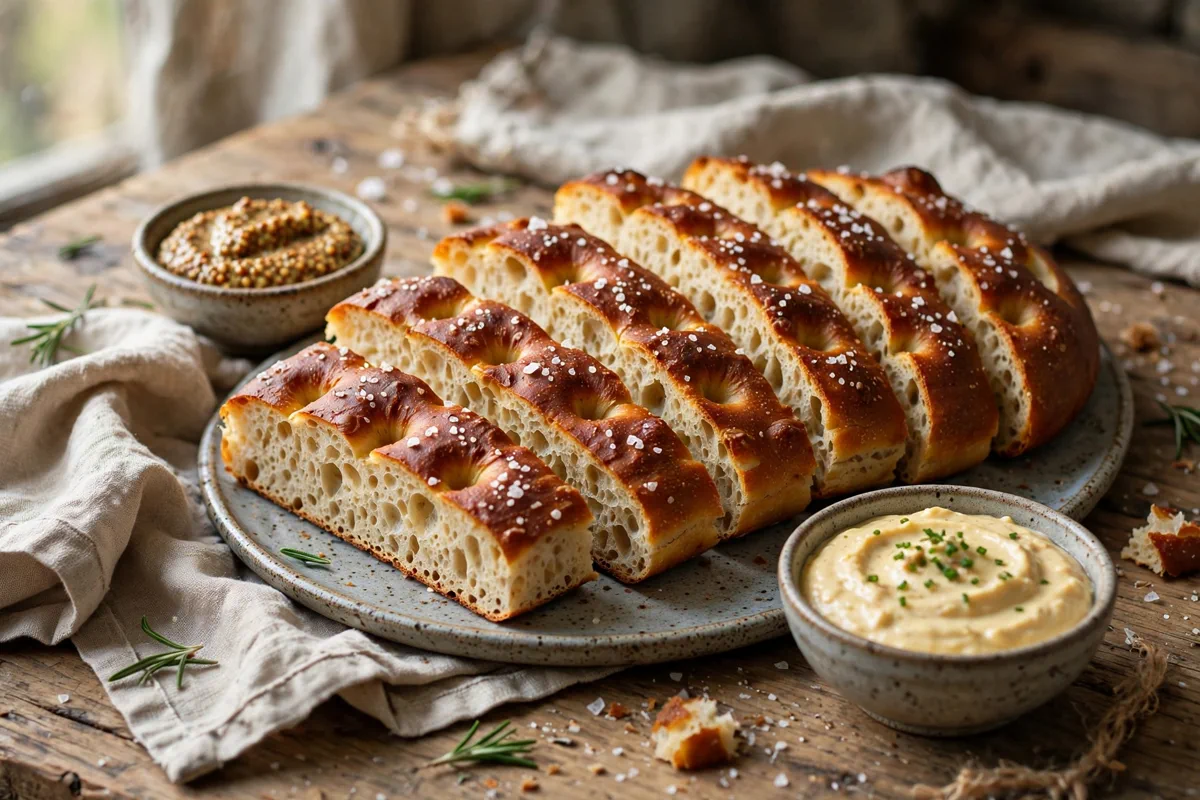
Why You’ll Love This Recipe
Quick & EffortlessReady in just 145 minutes total with straightforward, foolproof prep.
Packed with Deep FlavorCarefully balanced with all-purpose flour, warm water, instant yeast for maximum satisfaction.
Family & Crowd FriendlyMakes 12 generous servings that can be effortlessly doubled or scaled using our smart scaler.
Made From ScratchReal ingredients and straightforward home cooking, with no shortcuts on flavor.
Ingredients Notes & Variations
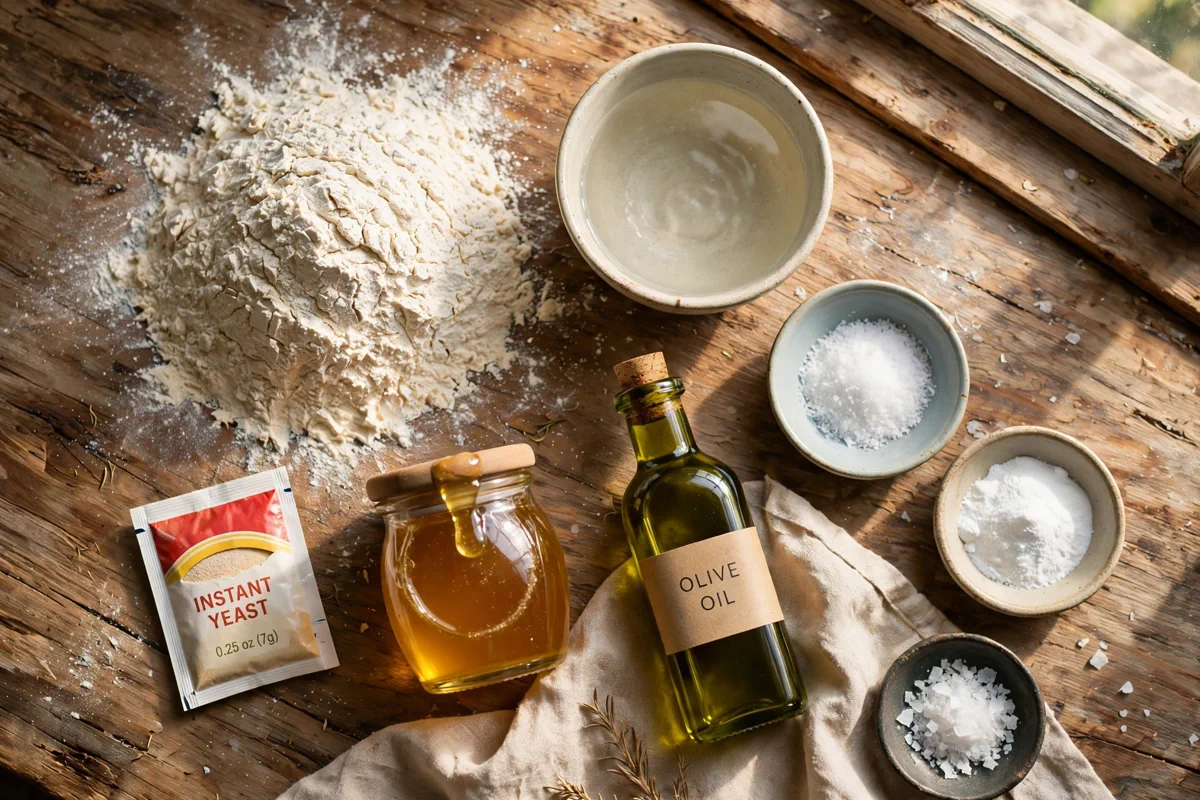
Here is an overview of what you will need for this recipe. Be sure to scroll down to the printable recipe card below for exact scaled measurements!
all-purpose flour
4 cupspooned into the cup and leveled
warm water
2 cup105-115°F, warm to the touch but not hot
instant yeast
2.25 tspone standard packet
honey
1 tbspor granulated sugar
fine sea salt
2 tspfor the dough, not the topping
extra-virgin olive oil
0.25 cupplus 2 tablespoons for oiling the pan
baking soda
2 tbspfor the pretzel wash
hot water
1 cupjust boiled, for dissolving the baking soda
flaky sea salt
1 tbsppretzel salt or Maldon; do not use table salt here
How to Make (Step-by-Step Overview)
Here is a quick summary of the preparation process. Detailed cooking temperatures and step timers are included in the recipe card below.
Whisk the warm water, honey, and instant yeast in a large bowl. Let it sit for 5 minutes until it looks foamy and smells faintly like bread. If nothing happens, your water was too hot or the yeast is old, start over.
Add the flour, fine sea salt, and 1/4 cup olive oil. Stir with a wooden spoon until no dry flour remains. The dough will be shaggy, rough, and very sticky. That is exactly right for no-knead focaccia.
Cover the bowl with a damp towel or plastic wrap. Let it rise at room temperature for about 60 minutes, until roughly doubled with bubbles breaking the surface. In a cool kitchen, give it more time.
Pour 2 tablespoons of olive oil into a 9x13-inch pan and tilt to coat the bottom and sides. Tip the dough in, fold it over itself once like a letter, then nudge it toward the corners. It will not reach them yet. Cover and rest 30 minutes until puffy and relaxed.
Heat the oven to 475°F (245°C) with a rack in the middle position.
Make the pretzel wash: pour the hot water into a small bowl and stir in the baking soda until it dissolves completely and the water looks clear.
Brush the wash evenly over the entire surface of the dough, re-dipping the brush so no spot is missed. Let it sit for one minute so the surface turns tacky.
Oil your fingertips generously. Press straight down through the dough to the bottom of the pan to make deep dimples, about 20 to 24 of them. Lift straight up, no twisting. Work quickly so the dough does not deflate.
Scatter the flaky sea salt evenly over the dimpled dough.
Bake for 18 to 22 minutes, until the top is deep mahogany brown with the dimples a shade darker. The kitchen will smell toasty and faintly like a pretzel shop near the end. If it is only golden, give it more time.
Cool in the pan for 10 minutes so the bottom sets and stays crisp. Loosen the edges with a spatula, move the loaf to a cooling rack, and tear or slice. Cutting too early turns the crumb gummy.
Our Pro Tips for Success
- •Mix the dough wetter than you think is right. A slack, sticky dough is what gives focaccia its open, airy holes. If the dough feels firm and neat, you did not add enough water.
- •Oil your fingertips before dimpling, not after you start. Dry fingers stick and tear the surface; oiled fingers press clean dimples straight to the bottom of the pan.
- •Do not skip the 10-minute rest in the pan before moving the loaf to a rack. The hot bottom firms up as it sits, and that is what keeps the underside crisp instead of steamy and soft.
- •If your salt sinks into the wash and vanishes, the surface was too wet. Let the brushed wash sit for one minute, then salt. The flakes need a tacky surface to grip, not a puddle.
Storage & Make-Ahead Instructions
Refrigerator:Store leftovers in an airtight container for up to 3 to 4 days.
Freezer:Freeze in freezer-safe containers or bags for up to 2 months. Thaw overnight in the fridge.
Reheating:Reheat gently in a 350°F oven or covered skillet with a splash of broth until heated through.
Interactive Kitchen Assistant Live Smart Scaler
Our Recipe Precision Calculators
Calculate exact roasting times, internal temperatures, brining ratios, and safe thaw windows.
2.5 lbs (1.13 kg)
Recommended Timing & Thermals
Est. Cook Time45 mins
Rest Period7 mins
Pull From Heat160°F (71°C)
Final Carryover165°F (74°C)
Insert meat thermometer into thickest center without touching bone for 100% juicy safety.
What Is Pretzel Focaccia?
Pretzel focaccia is exactly what the name promises: a chewy, dimpled focaccia loaf finished the way soft pretzels are finished. The dough is the easy no-knead focaccia you may already know, wet and hands-off. The finish is borrowed from the pretzel bakery: before it goes into a hot oven, the dough gets brushed with a baking-soda wash and showered with coarse salt. You end up with a deep mahogany crust, a soft open crumb inside, and that faint pretzel tang in every bite.
The idea is less strange than it sounds. Focaccia and soft pretzels are cousins. Both are simple yeasted doughs with salt on top. The difference is the wash. Plain focaccia browns gently and tastes of olive oil. A pretzel wash makes the crust brown harder, chew more, and taste faintly of the bakery case at the mall. Put the two together and you get a bread that works as a snack, a sandwich base, and a dinner-table tear-apart, all from one pan.
Why the Baking-Soda Wash Works
Real pretzel bakeries dip their dough in food-grade lye, which is not something most of us keep in the kitchen. Baking soda dissolved in hot water is the home version of the same trick. It makes the surface of the dough alkaline, and an alkaline surface browns much faster in the oven than a plain one. That is the entire mechanism. Faster browning means the crust reaches that dark pretzel color in the same 20 minutes the inside needs to bake through.
The wash also changes the flavor. The alkaline surface gives the crust a faint tangy edge that your tongue reads as "pretzel" even if you could not name it. One even coat is enough. This is a wash, not a soak. If you pour the wash on instead of brushing it, it pools in the dimples and can leave bitter spots, so brush it on thin and move on.
The Dough Comes Together in Ten Minutes
This is a no-knead dough, which means the recipe asks almost nothing of you and the yeast does the rest. Stir the flour, yeasty water, honey, salt, and olive oil until no dry flour remains, then cover the bowl and walk away. The dough will look rough and slack. It will stick to the spoon. If you are used to smooth kneaded dough, this will look wrong. It is not wrong. A wet dough is what makes focaccia's open, airy holes, and a firm dough makes a tight, bready crumb instead.
The honey is there for two jobs. It feeds the yeast a little faster than flour alone would, and its sugars help the crust brown. You will not taste it in the finished bread. Granulated sugar does the same job if that is what you have.
The first rise takes about an hour at room temperature. You are looking for the dough to roughly double, with bubbles breaking the surface and a faint domed top. In a cool kitchen, give it another 20 or 30 minutes. Yeast works on its own schedule, not yours, and under-proofed focaccia bakes up dense. When the dough jiggles like set custard when you nudge the bowl, it is ready.
The Overnight Option Makes Better Bread
If you have the time, make the dough the night before. Mix it, cover the bowl, and put it straight in the refrigerator for up to 12 hours. The cold slows the yeast down, and the slow ferment builds a deeper, more interesting flavor than the one-hour room-temperature version. This is the same principle behind overnight pizza dough, and it works just as well here.
The next day, tip the cold dough into the oiled pan and give it about 45 minutes to relax and puff before the wash and bake. Cold dough is stiff, so do not force it into the corners. The rest does the work.
The Pan and the Oil Are Doing Real Work
Use a 9x13-inch metal baking pan. Glass works, but metal gives you a crisper bottom. Pour in the oil and tilt the pan so it coats the bottom and the sides. This is not just to prevent sticking. The oil fries the bottom of the dough as it bakes, which is where focaccia's crisp, golden underside comes from. A stingy pan makes a pale, soft bottom.
After the dough goes in, fold it over itself once, like folding a letter. This one fold builds a little structure into a dough that had none, since we never kneaded it. Then nudge it toward the corners and leave it alone. It will not reach the corners yet. During the 30-minute rest in the pan, the dough relaxes, spreads, and puffs. If you try to stretch it to the corners right away, it springs back and tears. Patience stretches dough better than hands do.
Dimpling Without Deflating the Loaf
Dimples are focaccia's signature, and they are not just decoration. They keep the dough from puffing into one big pillow in the oven, and each dimple holds a little pool of olive oil and a few flakes of salt. For a 9x13 pan, aim for 20 to 24 dimples.
The order matters: wash first, dimple second, salt third. Brushing the wash on before dimpling means the inside of each dimple gets the alkaline coating too, so the dimples brown darker than the ridges. That contrast is what makes the finished loaf look like it came from a bakery.
Oil your fingertips before you start, and re-oil them if they start to drag. Press straight down until your fingers touch the bottom of the pan, then lift straight up. Do not twist or wiggle. Twisting tears the surface and the dimple fills back in. Work quickly and confidently. A slow, hesitant hand lets the gas escape and the loaf deflates, which is the most common way this bread turns out flat.
Baking: What "Done" Actually Looks Like
The oven needs to be genuinely hot: 475°F, middle rack, fully preheated. A cooler oven gives you a pale, soft crust no matter how good the wash was. The loaf bakes for 18 to 22 minutes. Start checking at 18.
Done means deep mahogany, darker than you expect. The top should be the color of a well-baked soft pretzel, with the dimples a shade darker than the ridges. If the loaf is golden blonde, it is not done. Give it more time. The salt on top may look glossy or slightly melted. That is fine.
When it comes out, leave it in the pan for 10 minutes. This rest lets the bottom firm up so it stays crisp instead of steaming soft. Then loosen the edges with a spatula and move the loaf to a cooling rack. Do not cut into it yet. Cutting a hot loaf lets the steam escape through the cut instead of the crust, and the crumb turns gummy. Ten minutes of patience is the difference between a chewy crumb and a gluey one.
The Salt Is Not Optional
Table salt will not do the job here. Fine salt dissolves into the damp wash and disappears, and you end up with a browned loaf that tastes under-salted on top. Coarse pretzel salt is the classic choice, and flaky sea salt like Maldon is the easy substitute. The crystals sit on the surface in visible flakes and give you crunchy bursts of salt with each bite, which is half of what makes a pretzel taste like a pretzel.
One tablespoon, scattered as evenly as you can. The dimples will catch most of it, which is exactly where you want it.
How to Serve It
Torn warm from the pan is the best way to eat this bread, and honestly it needs nothing else. If you want a dip, a quick cheese sauce or a grainy mustard both suit the pretzel character. The loaf in the photos sits next to a small bowl of beer cheese, and that pairing is as good as it looks.
As a sandwich bread, it is sturdy: sliced horizontally, it holds a serious pile of fillings without going soggy. With soup, the chewy crumb soaks up broth without falling apart. Leftovers toast beautifully the next day, when the crust re-crisps.
Three Things That Commonly Go Wrong
- Pale crust. The oven was not hot enough, or the wash was too weak. Make sure the water was genuinely hot when you dissolved the baking soda, brush the wash on evenly with no missed patches, and bake at a full 475°F.
- Gummy middle. The loaf was cut too soon, or the pan was too small and the dough baked up thick. Cool the full 10 minutes before slicing, and stick to the 9x13 pan size.
- Bitter spots or burnt salt. The wash pooled in the dimples instead of coating them thinly. Brush, do not pour, and let the surface sit tacky for a minute before salting.
Frequently Asked Questions
Yes, and the overnight version is actually better. Mix the dough, cover the bowl, and refrigerate up to 12 hours. The slow cold rise builds more flavor. The next day, let the cold dough sit in the oiled pan for about 45 minutes to relax and puff before the wash, salt, and bake.
A pale crust means the wash was too weak or the oven was not hot enough. Make sure the water is genuinely hot when you dissolve the baking soda, brush it on evenly, and bake at a full 475°F. The loaf should come out deep mahogany, not golden.
Easy Chicken Recipes • Official Card
Pretzel Focaccia (Chewy, Salty, No-Knead)
☆☆☆☆☆0.0 (0 reviews)•Recipe by Cooking With Guru Editorial Team•Updated: Jan 15, 2025
Chewy no-knead focaccia gets the soft-pretzel treatment: a baking-soda wash, coarse salt, and deep dimples. Crisp mahogany crust, airy crumb.
Prep Time25 mins
Cook Time20 mins
Total Time145 mins
Adjust Servings:
12
Ingredients
Click to check off4 cups all-purpose flour(spooned into the cup and leveled)
2 cups warm water(105-115°F, warm to the touch but not hot)
2 1/4 tsps instant yeast(one standard packet)
1 tbsp honey(or granulated sugar)
2 tsps fine sea salt(for the dough, not the topping)
1/4 cup extra-virgin olive oil(plus 2 tablespoons for oiling the pan)
2 tbsps baking soda(for the pretzel wash)
1 cup hot water(just boiled, for dissolving the baking soda)
1 tbsp flaky sea salt(pretzel salt or Maldon; do not use table salt here)
Equipment Needed
- large mixing bowl
- 9x13-inch baking pan or half-sheet pan
- whisk
- pastry brush
- cooling rack
Instructions
Step-by-StepWhisk the warm water, honey, and instant yeast in a large bowl. Let it sit for 5 minutes until it looks foamy and smells faintly like bread. If nothing happens, your water was too hot or the yeast is old, start over.
Add the flour, fine sea salt, and 1/4 cup olive oil. Stir with a wooden spoon until no dry flour remains. The dough will be shaggy, rough, and very sticky. That is exactly right for no-knead focaccia.
Cover the bowl with a damp towel or plastic wrap. Let it rise at room temperature for about 60 minutes, until roughly doubled with bubbles breaking the surface. In a cool kitchen, give it more time.
Pour 2 tablespoons of olive oil into a 9x13-inch pan and tilt to coat the bottom and sides. Tip the dough in, fold it over itself once like a letter, then nudge it toward the corners. It will not reach them yet. Cover and rest 30 minutes until puffy and relaxed.
Heat the oven to 475°F (245°C) with a rack in the middle position.
Make the pretzel wash: pour the hot water into a small bowl and stir in the baking soda until it dissolves completely and the water looks clear.
Brush the wash evenly over the entire surface of the dough, re-dipping the brush so no spot is missed. Let it sit for one minute so the surface turns tacky.
Oil your fingertips generously. Press straight down through the dough to the bottom of the pan to make deep dimples, about 20 to 24 of them. Lift straight up, no twisting. Work quickly so the dough does not deflate.
Scatter the flaky sea salt evenly over the dimpled dough.
Bake for 18 to 22 minutes, until the top is deep mahogany brown with the dimples a shade darker. The kitchen will smell toasty and faintly like a pretzel shop near the end. If it is only golden, give it more time.
Cool in the pan for 10 minutes so the bottom sets and stays crisp. Loosen the edges with a spatula, move the loaf to a cooling rack, and tear or slice. Cutting too early turns the crumb gummy.
CWG
Recipe Source
The Cooking With Guru Team
Our recipes are developed and checked by the Cooking With Guru team. Nutrition figures are estimates calculated from USDA data, and yields scale with the built-in portion tools so the recipe fits your kitchen.
More baking recipes to try!
🍽️
Turkish Menemen: One-Pan Eggs in Spicy Tomato Sauce
🍽️
High-Protein Cottage Cheese Egg Bake with Spinach
🍽️
Easy Chicken Congee Recipe with Crispy Garlic and Chili Oil
Comments & Questions (0)
Join the conversationNo comments yet!
Be the first to leave a comment or ask a question about Pretzel Focaccia (Chewy, Salty, No-Knead).