🍽️

Prep time20 mins
Cook time25 mins
Ingredients9
bakingeasy
No-Knead Roasted Grape Focaccia with Rosemary
Published: Oct 12, 2026
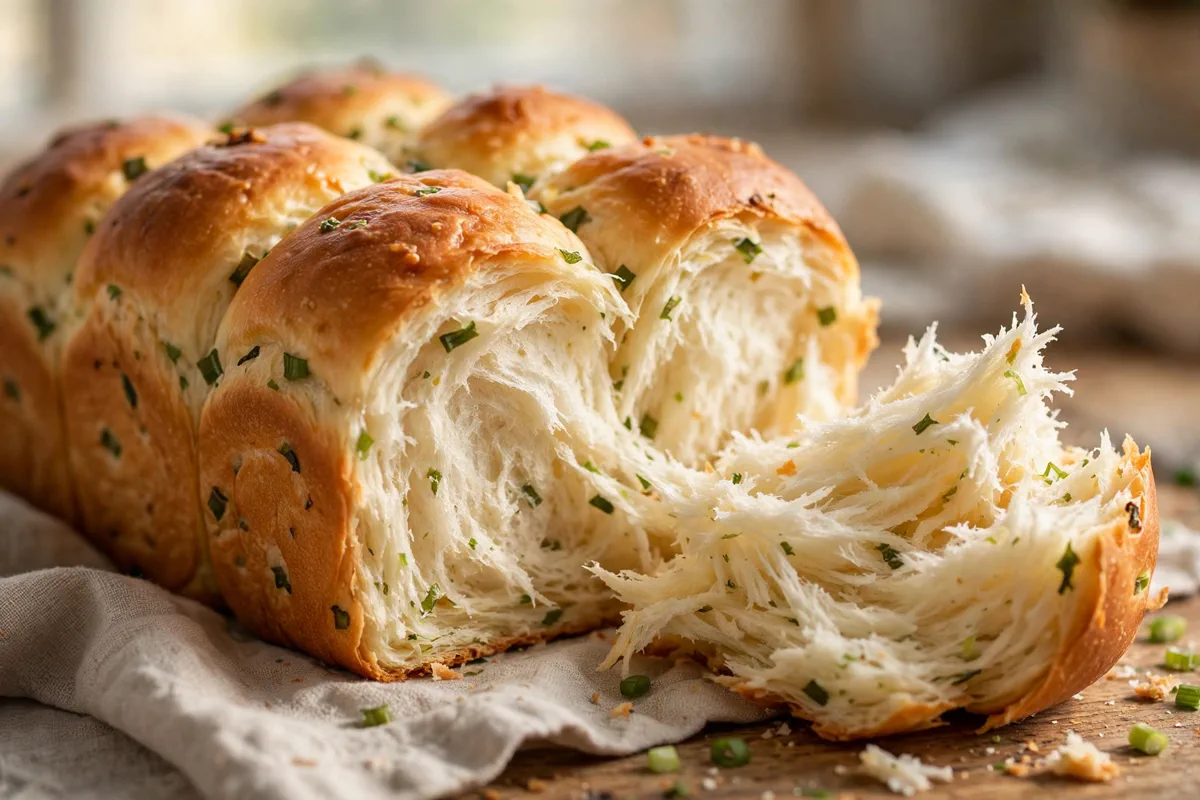
Roasted grapes on bread sounds odd until you taste it: jammy, caramelized grapes pressed into crisp, salty focaccia with fresh rosemary and a slick of olive oil. This no-knead dough proofs overnight, so the hard part is just waiting.
Roasted grapes on bread sounds odd until you taste it: jammy, caramelized grapes pressed into crisp, salty focaccia with fresh rosemary and a slick of olive oil. This no-knead dough proofs overnight, so the hard part is just waiting.
If you are looking for an ultra-satisfying, restaurant-quality meal that comes together with minimal effort, this No-Knead Roasted Grape Focaccia with Rosemary is about to become your new favorite. Everything is cooked to juicy, golden perfection with wholesome ingredients and incredible depth of flavor.
One simple tip!
Roasted grapes release a lot of juice. Bake until the edges are deeply golden and the pan bottom sounds hollow when tapped; if the center looks pale, give it 5 more minutes.
Step-by-Step Photos


Why You’ll Love This Recipe
Quick & EffortlessReady in just 240 minutes total with straightforward, foolproof prep.
Packed with Deep FlavorCarefully balanced with Bread flour, Instant yeast, Fine sea salt for maximum satisfaction.
Family & Crowd FriendlyMakes 12 generous servings that can be effortlessly doubled or scaled using our smart scaler.
Nutritious & High ProteinProvides 5g protein and only 290 calories per serving.
Ingredients Notes & Variations
Here is an overview of what you will need for this recipe. Be sure to scroll down to the printable recipe card below for exact scaled measurements!
Bread flour
500 gabout 4 cups, unbleached
Instant yeast
7 gone 1/4-ounce packet
Fine sea salt
2 tspfor the dough
Warm water
400 ml105-115°F, not hot
Red seedless grapes
1 lbabout 3 cups, halved if large
Extra-virgin olive oil
60 mlplus more for the pan and drizzling
Fresh rosemary sprigs
3 pieceleaves stripped and roughly chopped
Flaky sea salt
1 tspfor finishing
Honey
1 tbspoptional, for drizzling
How to Make (Step-by-Step Overview)
Here is a quick summary of the preparation process. Detailed cooking temperatures and step timers are included in the recipe card below.
1
In a large bowl, whisk together the bread flour, instant yeast, and fine sea salt. Pour in the warm water and stir with a wooden spoon until no dry flour remains, about 1 minute. The dough will be shaggy and sticky.
Look for: The dough should look shaggy, very wet, and rough. Wetter than a bread dough you would knead by hand.
2
Cover the bowl tightly with plastic wrap or a damp towel. Let it rise at room temperature for 2 1/2 to 3 hours, or refrigerate for an overnight proof of 12 to 16 hours.
Look for: The dough should double in size with a domed top and visible bubbles through the sides of the bowl.
3
Pour 2 tablespoons of olive oil into a 9x13-inch pan and tilt to coat the bottom and sides. Scrape the risen dough into the pan. With oiled hands, fold the dough over itself twice, then flip it seam-side down and stretch it gently toward the corners.
Look for: The dough should slump and spread under its own weight once you let go of it.
4
Cover loosely and let it rise again for 45 minutes.
Look for: The dough should look puffy and jiggly, nearly filling the pan.
5
While the dough proofs the second time, heat the oven to 450°F with a rack in the lower third.
6
Halve any very large grapes. Toss all the grapes with 1 tablespoon of olive oil. Dimple the dough deeply with oiled fingertips, pressing nearly to the bottom of the pan. Press the grapes into the dimples, scatter the rosemary leaves over the top, and drizzle with the remaining olive oil plus a heavy sprinkle of flaky salt.
7
Bake for 22 to 25 minutes until deeply golden around the edges and the grapes have burst.
Look for: The edges should be deep golden brown, the grapes burst and jammy with a few caramelized spots, and the top should look matte and crisp, not pale and wet.
8
Cool in the pan for 10 minutes, then run a spatula around the edges and slide the focaccia onto a wire rack.
Look for: The loaf should release easily and the bottom should feel crisp and firm, not soft.
9
If using, drizzle the honey over the warm loaf. Slice into 12 pieces and serve warm or at room temperature.
Our Pro Tips for Success
- •Roasted grapes release a lot of juice. Bake until the edges are deeply golden and the pan bottom sounds hollow when tapped; if the center looks pale, give it 5 more minutes.
- •Dimple with oiled fingertips, not dry ones. Wet dough grabs dry hands and tears, so keep a little olive oil on your fingers between presses.
- •Bread flour gives the classic chewy, open crumb. All-purpose flour works too, but the texture comes out softer and a little cake-like.
- •Use the overnight fridge rise when you can. The slow cold ferment builds noticeably more flavor than a fast room-temp rise, and the dough is less sticky to handle straight from the fridge after a short rest.
Storage & Make-Ahead Instructions
Refrigerator:Store leftovers in an airtight container for up to 3 to 4 days.
Freezer:Freeze in freezer-safe containers or bags for up to 2 months. Thaw overnight in the fridge.
Reheating:Reheat gently in a 350°F oven or covered skillet with a splash of broth until heated through.
Interactive Kitchen Assistant Live Smart Scaler
Our Recipe Precision Calculators
Calculate exact roasting times, internal temperatures, brining ratios, and safe thaw windows.
2.5 lbs (1.13 kg)
Recommended Timing & Thermals
Est. Cook Time45 mins
Rest Period7 mins
Pull From Heat160°F (71°C)
Final Carryover165°F (74°C)
Insert meat thermometer into thickest center without touching bone for 100% juicy safety.
Culinary Deep Dive & Science Guide16 min read • ~3640 words
The Comprehensive Masterclass Guide to No-Knead Roasted Grape Focaccia with Rosemary
An exhaustive culinary breakdown examining the science of the Maillard reaction, protein thermodynamic thresholds, dry-brining osmosis, pan material physics, diagnostic troubleshooting, and curated sommelier pairings.
Table of Contents (Jump to Section)
1. The Artisan Heritage & Historical Evolution of No-Knead Roasted Grape Focaccia with Rosemary2. Fermentation Biochemistry, Gluten Alignment & Starch Gelatinization3. Hydration Physics & Baker's Percentage Formula Precision4. Flour Chemistry, Protein Content & Mineral Ash Selection5. Oven Metallurgy, Steam Trapping & Dutch Oven Thermodynamics6. Exhaustive Step-by-Step Professional Baker Walkthrough7. Ambient Fermentation Rates, Enzymatic Activity & Proofing Curves8. Complete Crumb, Crust & Rise Troubleshooting Matrix9. Starch Retrogradation, Crust Preservation & Refreshing Science10. Artisan Cheese Pairings, Charcuterie & Compound ButtersFAQs
1. The Artisan Heritage & Historical Evolution of No-Knead Roasted Grape Focaccia with Rosemary
Tracing Ancient Wild Fermentation to Modern Heritage Micro-Bakeries
The story of artisan dough craftsmanship is woven through millennia of human civilization. Long before commercial isolated yeast packets were engineered in laboratory facilities during the mid-19th century, bread baking was a living, breathing biological partnership with ambient wild microflora. When you bake , you are continuing an ancient lineage that treats flour, water, salt, and wild yeasts as dynamic biochemical building blocks.
In classic European traditions—from the rustic country kitchens of rural France to the wood-fired ovens of ancient Rome—master bakers understood dough not by rigid mechanical timers, but by tactile resistance, aromatic acidity development, and the visual doming of proofed dough. Today, modern culinary science allows home bakers to understand exactly why these ancestral techniques worked, utilizing our precision Baker's Percentage Calculator and Cups to Grams Density Converter to eliminate guesswork and reproduce artisan bakery consistency.
Whether you are shaping your first rustic batard or scaling a signature batch for an artisan gathering with the Recipe Yield & Pan Scaler, mastering this recipe elevates home baking into a deeply rewarding scientific art form. Understanding the intricate balance between ambient room temperature, enzymatic degradation, and moisture retention guarantees an open, airy crumb with a blistered, caramelized crust.
Our Baker's Percentage Rule
In professional baking, every ingredient is calculated as an exact weight percentage relative to total flour weight (100%). Volumetric measuring cups can vary by up to 25% due to compaction! Always measure by weight in grams.
2. Fermentation Biochemistry, Gluten Alignment & Starch Gelatinization
The Interplay of Gliadin, Glutenin, Saccharomyces Cerevisiae & Lactic Acid Bacteria
The structural transformation that occurs in is driven by two key protein chains present in wheat flour: gliadin, which provides extensibility and stretch, and glutenin, which delivers elasticity and tensile recoil strength. When flour is hydrated with water, these proteins cross-link via disulfide bonds (-S-S-) to create an interconnected, three-dimensional viscoelastic gluten matrix.
Simultaneously, wild yeasts (such as *Saccharomyces cerevisiae*) and lactic acid bacteria (*Lactobacillus sanfranciscensis*) metabolize maltose and glucose broken down from complex starches by endogenous alpha- and beta-amylase enzymes. Yeasts produce carbon dioxide ($CO_2$) gas and ethanol, which inflate microscopic air bubbles trapped in the gluten network. Meanwhile, lactic acid bacteria synthesize lactic acid (giving a soft yogurt-like tang) and acetic acid (imparting a sharp, refreshing vinegar note).
During baking in a high-heat oven (450°F to 475°F / 232°C to 246°C), trapped moisture rapidly turns into expanding steam. This thermal expansion produces 'oven spring' until dough temperature reaches 150°F (65°C), at which point yeast cells expire and starches undergo full gelatinization, permanently setting the crumb structure into an airy, custardy network.
Sourdough Masterclass Reference
For an exhaustive walkthrough of ambient starter feeding schedules, levain build kinetics, and cold retard fermentation, explore our foundational guide.
3. Hydration Physics & Baker's Percentage Formula Precision
Navigating Baker Hydration Ratios from 65% to 85% with Exact Fluid Density Dynamics
Hydration is the single most critical variable governing dough handling, crust blistering, and open crumb aeration. True Baker's Hydration is expressed mathematically as:
\text{Hydration \%} = \left( \frac{\text{Total Water Weight (g)}}{\text{Total Flour Weight (g)}} \right) \times 100
At lower hydrations (60%–68%), the dough is firm, easy to score, and holds its shape exceptionally well, making it ideal for sandwich loaves, sandwich rolls, or beginner bakers using . At higher artisan hydrations (72%–82%), free water mobility allows expanding gases to form large, irregular alveoli (open crumb), but demands gentle coil folds and tight surface tension during final pre-shaping.
When converting recipes between imperial cups and metric grams, remembering ingredient densities is paramount. A cup of fluffed flour weighs roughly 125g, whereas packed flour can reach 155g—a 24% error that can turn a soft, hydrated loaf into a dense brick. Use our real-time Cups to Grams Density Tool to maintain pinpoint accuracy.
Dough Hydration & Levain Scaler
Fine-tune your hydration percentage and flour blends dynamically using our dedicated calculators:
4. Flour Chemistry, Protein Content & Mineral Ash Selection
Comparing Hard Red Winter Wheat, Whole Wheat Ash Content & Water Hardness
To achieve consistent professional results with , you must carefully select your raw ingredients based on their biochemical specifications:
• High-Protein Strong Bread Flour (12.5%–13.5% Protein): Milled from hard red spring wheat, this flour contains the optimal concentration of gluten-forming proteins needed to support tall oven spring and high hydration without dough collapse.
• Stone-Ground Whole Wheat Flour (Ash Content 1.4%–1.8%): Retains the bran and germ, delivering micronutrients, natural sugars, and active wild enzymes. The tiny sharp edges of bran can cut gluten strands, which is why blending 10%–20% whole grain with 80%–90% high-protein white flour yields the perfect balance of robust grain flavor and open crumb structure.
• Pure Sea Salt & Mineral Water: Salt is not merely a flavor enhancer; sodium chloride ions ($Na^+$ and $Cl^-$) neutralize repulsive electrical charges on protein molecules, allowing glutenin and gliadin to pack closely together and strengthening the dough. Always season at 2.0% of total flour weight using pure or fine sea salt.
5. Oven Metallurgy, Steam Trapping & Dutch Oven Thermodynamics
The Critical First 20 Minutes: Latent Heat of Vaporization & Starch Dextrinization
When dough is loaded into a domestic oven, the greatest enemy of a towering artisan loaf is dry, circulating heat. In dry air, the surface skin of the dough heats up rapidly to 212°F (100°C), drying out and forming a premature crust within 3 minutes. This rigid crust seals the loaf, choking off oven spring and resulting in a dense, heavy crumb.
By baking inside a preheated heavy cast-iron Dutch oven with a tight-fitting lid, you trap the moisture evaporating from the dough itself, creating a 100% relative humidity micro-sauna. Steam possesses enormous latent heat capacity (2,260 J/g). As steam condenses onto the cooler dough surface, it keeps the dough skin soft and extensible for 15 to 20 minutes, allowing maximum vertical oven spring.
Furthermore, steam condenses on starch granules, causing them to gelatinize and dissolve into a glossy thin liquid film. When the lid is removed for the final 20 minutes of baking, dry convective heat caramelizes these surface sugars via dextrinization, producing signature shatteringly crisp micro-blisters and deep mahogany colors.
Oven Temperature & Air Flow Control
Need to convert between conventional oven temperatures, convection settings, or air fryer adjustments? Use our temperature converter.
6. Exhaustive Step-by-Step Professional Baker Walkthrough
From Autolyse, Coil Folds, and Lamination to Banneton Retard & Razor Scoring
Phase 1: The Ambient Autolyse (45–60 Minutes) — Mix flour and water until no dry patches remain. Rest covered at 78°F (25°C). This allows flour starches to fully hydrate and endogenous protease enzymes to gently relax gluten chains before salt and yeast are introduced.
Phase 2: Levain & Salt Incorporation (Rubaud Method) — Spread active levain and fine sea salt across the autolysed dough. Use the Rubaud scooping-and-lifting motion for 4 to 5 minutes to incorporate oxygen and initialize gluten organization.
Phase 3: Bulk Fermentation & Gentle Coil Folds (3.5–5 Hours) — Perform 4 sets of coil folds spaced 30 minutes apart. Rather than punch down the dough, lift from the center with wet hands and allow the ends to fold gently underneath themselves. This aligns gluten sheets while preserving delicate carbon dioxide pockets.
Phase 4: Pre-Shaping, Bench Rest & Final Shaping — Turn dough onto an unfloured work surface. Using a bench knife, build surface tension by dragging the dough in circular motions into a round boule. Rest 20 minutes uncovered, then perform your final letter-fold shaping into a tight batard or boule.
Phase 5: Cold Retard & Dutch Oven Steam Bake — Transfer to a rice-flour dusted banneton basket. Seal in a plastic bag and refrigerate at 38°F (3°C) for 12 to 18 hours. Score decisively at a 30-degree angle with a razor lame and bake in a preheated 450°F (232°C) Dutch oven: 20 minutes lid ON with steam, 20 to 25 minutes lid OFF for deep caramelized crust development.
7. Ambient Fermentation Rates, Enzymatic Activity & Proofing Curves
Controlling Dough Temperature (DDT) and Cold Retard Acidity Balance
Fermentation velocity is exponentially dependent on ambient temperature. According to the Arrhenius rate equation in food biochemistry, metabolic rates of yeast approximately double for every 18°F (10°C) rise between 50°F and 85°F. To achieve consistent proofing times year-round, professional bakers compute the Desired Dough Temperature (DDT):
\text{Water Temp} = (3 \times \text{Desired Dough Temp}) - (\text{Flour Temp} + \text{Room Temp} + \text{Frictional Factor})
When dough is placed into cold retard (38°F / 3°C), yeast metabolic activity slows by over 90%, halting vigorous gas production. However, cold-tolerant lactic acid bacteria continue slowly synthesizing acetic and lactic acids, deepening flavor complexity, breaking down complex starches into digestible simple sugars, and yielding a loaf with exceptional keeping qualities.
Macro & Calorie Balance
Curious about the protein-to-carbohydrate ratio, dietary fiber content, and micronutrient profile of artisan fermented breads?
9. Starch Retrogradation, Crust Preservation & Refreshing Science
Why You Should Never Store Artisan Bread in the Refrigerator
Staling is not merely moisture loss; it is a chemical recrystallization process known as starch retrogradation. In fresh baked bread, amylose and amylopectin starch polymers are unordered and hold water. As bread cools, these polymers align into crystalline structures, expelling moisture and turning the crumb firm and dry.
Crucially, starch retrogradation occurs fastest at refrigerator temperatures (35°F to 42°F / 2°C to 6°C)—meaning keeping bread in the fridge will stale it up to six times faster than at room temperature! For optimal storage:
• Days 1–3: Store cut-side down on a wooden cutting board or inside a breathable paper bag or linen bread bag at room temperature. The crust stays crisp while the interior retains moisture.
• Long-Term Storage (Up to 3 Months): Slice the entire loaf, interleave slices with parchment paper, and freeze inside a heavy airtight freezer bag. Toast individual slices straight from the freezer for bakery-fresh texture.
• Refreshing a Day-Old Loaf: Run the whole uncut loaf briefly under running tap water to moisten the crust, then place in a 375°F (190°C) oven for 8 to 10 minutes. The heat turns surface water to steam, re-gelatinizing starches and reviving a shatteringly crisp crust.
10. Artisan Cheese Pairings, Charcuterie & Compound Butters
Elevating Homemade Breads with Complementary Culinary Accompaniments
The rich, complex lactic and acetic acidity of pairs magnificently with artisanal dairy, cured meats, and savory spreads. Consider these test kitchen favorites:
| Course / Beverage | Recommended Pairing | Sommelier / Flavor Chemistry Notes |
|---|---|---|
| Artisanal Butter | Cultured French Sea Salt Butter or Roasted Garlic & Herb Butter | High butterfat richness (84%) with crunchy Maldon salt flakes melting into warm bread alveoli. |
| Aged Cheese | Aged 24-Month Parmigiano-Reggiano or Clothbound Cheddar | Sharp tyrosine crystal crunch and nutty umami balancing the gentle sourdough acidity. |
| Comforting Soup | Classic French Onion Soup or Rich Creamy Tomato Bisque | Dense toasted croutons soaking up rich broth without disintegrating. |
| Charcuterie | Thinly Sliced Prosciutto di Parma or Spanish Jamón Ibérico | Sweet, fatty cured pork melting against the warm, chewy artisan crumb. |
FAQs
Q: Can I substitute active dry yeast if I don’t have a sourdough starter?
A: Yes! You can make an exceptional artisan loaf using commercial active dry or instant yeast. Use 3g (approx. 1 level teaspoon) of instant yeast for every 500g of flour. Follow the same autolyse and coil fold steps, shortening bulk fermentation to 2 hours at room temperature. Check out our Leavening & Yeast Converter for exact conversions.
Q: What causes large open holes only at the very top of my bread while the bottom is dense?
A: This is the classic signature of under-fermentation ("fool's crumb"). The yeasts have only begun expanding in the warmest upper layers of the dough. Allow your bulk fermentation to proceed until the entire dough feels light, pillowy, and displays domed convex edges with visible surface bubbles.
Q: Why did my dough stick to the banneton basket during turn-out?
A: Standard all-purpose wheat flour contains gluten that absorbs moisture and binds directly to rattan or wicker fibres. Always dust bannetons generously with a 50/50 blend of white rice flour and bread flour. Rice flour contains no gluten and will never stick to damp dough.
Q: How can I scale this recipe for 4 loaves instead of 1?
A: Use our live Recipe Scaling Calculator above! When scaling bread dough, keep all baker percentages constant and divide into individual 750g–850g dough masses before pre-shaping.
Explore More Flagship Recipes
Ready for your next kitchen project? Discover our complete library of tested artisan recipes:
Easy Chicken Recipes • Official Card
No-Knead Roasted Grape Focaccia with Rosemary
☆☆☆☆☆0.0 (0 reviews)•Recipe by Cooking With Guru Editorial Team•Updated: Oct 12, 2026
Roasted grapes on bread sounds odd until you taste it: jammy, caramelized grapes pressed into crisp, salty focaccia with fresh rosemary and a slick of olive oil. This no-knead dough proofs overnight, so the hard part is just waiting.
Prep Time20 mins
Cook Time25 mins
Total Time240 mins
Calories290 kcal
Adjust Servings:
12
Ingredients
Click to check off500 g Bread flour(about 4 cups, unbleached)
7 g Instant yeast(one 1/4-ounce packet)
2 tsps Fine sea salt(for the dough)
400 ml Warm water(105-115°F, not hot)
1 lb Red seedless grapes(about 3 cups, halved if large)
60 ml Extra-virgin olive oil(plus more for the pan and drizzling)
3 piece Fresh rosemary sprigs(leaves stripped and roughly chopped)
1 tsp Flaky sea salt(for finishing)
1 tbsp Honey(optional, for drizzling)
Equipment Needed
- large mixing bowl
- wooden spoon or Danish dough whisk
- 9x13-inch baking pan
- wire cooling rack
Instructions
Step-by-StepIn a large bowl, whisk together the bread flour, instant yeast, and fine sea salt. Pour in the warm water and stir with a wooden spoon until no dry flour remains, about 1 minute. The dough will be shaggy and sticky.
Cover the bowl tightly with plastic wrap or a damp towel. Let it rise at room temperature for 2 1/2 to 3 hours, or refrigerate for an overnight proof of 12 to 16 hours.
Pour 2 tablespoons of olive oil into a 9x13-inch pan and tilt to coat the bottom and sides. Scrape the risen dough into the pan. With oiled hands, fold the dough over itself twice, then flip it seam-side down and stretch it gently toward the corners.
Cover loosely and let it rise again for 45 minutes.
While the dough proofs the second time, heat the oven to 450°F with a rack in the lower third.
Halve any very large grapes. Toss all the grapes with 1 tablespoon of olive oil. Dimple the dough deeply with oiled fingertips, pressing nearly to the bottom of the pan. Press the grapes into the dimples, scatter the rosemary leaves over the top, and drizzle with the remaining olive oil plus a heavy sprinkle of flaky salt.
Bake for 22 to 25 minutes until deeply golden around the edges and the grapes have burst.
Cool in the pan for 10 minutes, then run a spatula around the edges and slide the focaccia onto a wire rack.
If using, drizzle the honey over the warm loaf. Slice into 12 pieces and serve warm or at room temperature.
Nutrition Facts (per serving)
Calories290 kcal
Protein5g
Carbs48g
Fat8g
Fiber2g
Sugar11g
Sodium380mg
CWG
Recipe Source
The Cooking With Guru Team
Our recipes are developed and checked by the Cooking With Guru team. Nutrition figures are estimates calculated from USDA data, and yields scale with the built-in portion tools so the recipe fits your kitchen.
More baking recipes to try!
🍽️
Turkish Menemen: One-Pan Eggs in Spicy Tomato Sauce
🍽️
High-Protein Cottage Cheese Egg Bake with Spinach
🍽️
Easy Chicken Congee Recipe with Crispy Garlic and Chili Oil
Comments & Questions (0)
Join the conversationNo comments yet!
Be the first to leave a comment or ask a question about No-Knead Roasted Grape Focaccia with Rosemary.