🍽️
Prep time40 mins
Cook time22 mins
Ingredients7
baking
Sourdough Discard Crackers with Everything Seasoning
Published: Jan 15, 2025
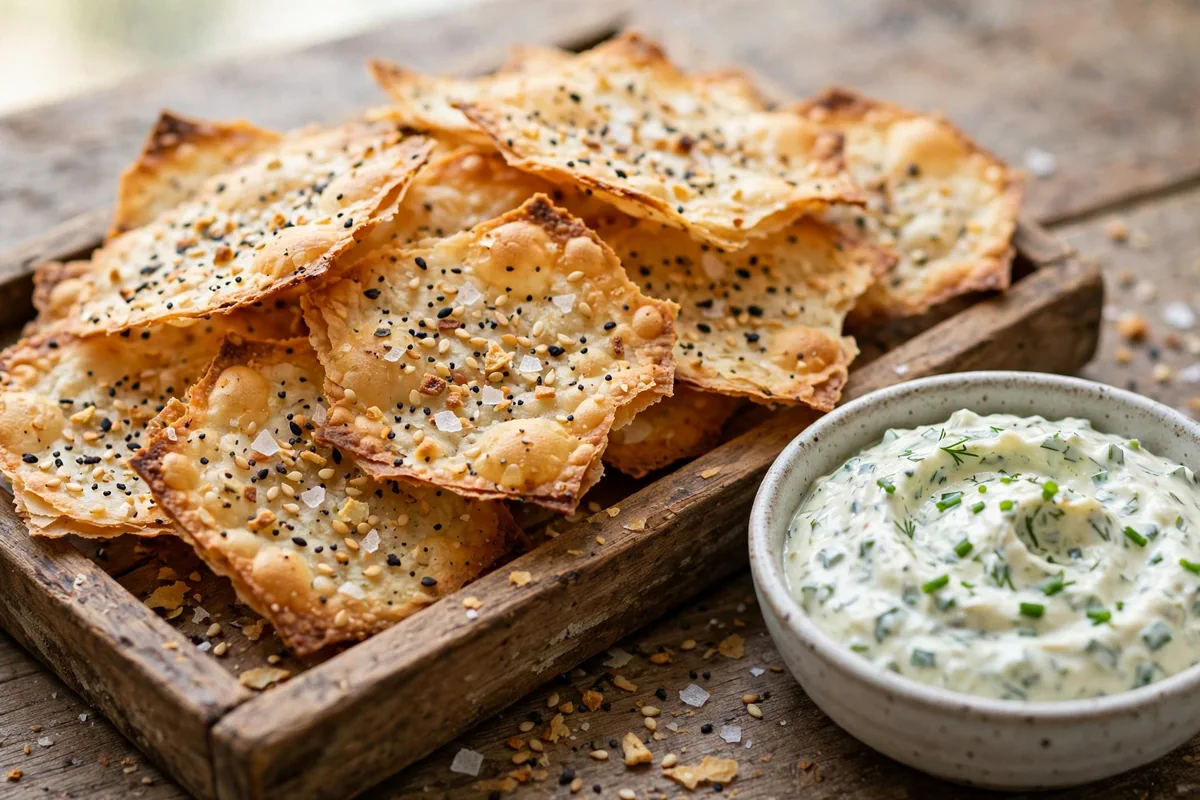
Thin, crisp sourdough discard crackers with everything seasoning. Zero-waste baking, ready in about an hour, perfect with dip.
Thin, crisp sourdough discard crackers with everything seasoning. Zero-waste baking, ready in about an hour, perfect with dip.
If you are looking for an ultra-satisfying, restaurant-quality meal that comes together with minimal effort, this Sourdough Discard Crackers with Everything Seasoning is about to become your new favorite. Everything is cooked to juicy, golden perfection with wholesome ingredients and incredible depth of flavor.
One simple tip!
Let the discard come to room temperature for 20 minutes before mixing. Cold discard straight from the fridge makes a stiff dough that tears when you roll it.
Step-by-Step Photos
Why You’ll Love This Recipe
Quick & EffortlessReady in just 62 minutes total with straightforward, foolproof prep.
Packed with Deep FlavorCarefully balanced with Sourdough discard, All-purpose flour, Olive oil for maximum satisfaction.
Family & Crowd FriendlyMakes 8 generous servings that can be effortlessly doubled or scaled using our smart scaler.
Made From ScratchReal ingredients and straightforward home cooking, with no shortcuts on flavor.
Ingredients Notes & Variations
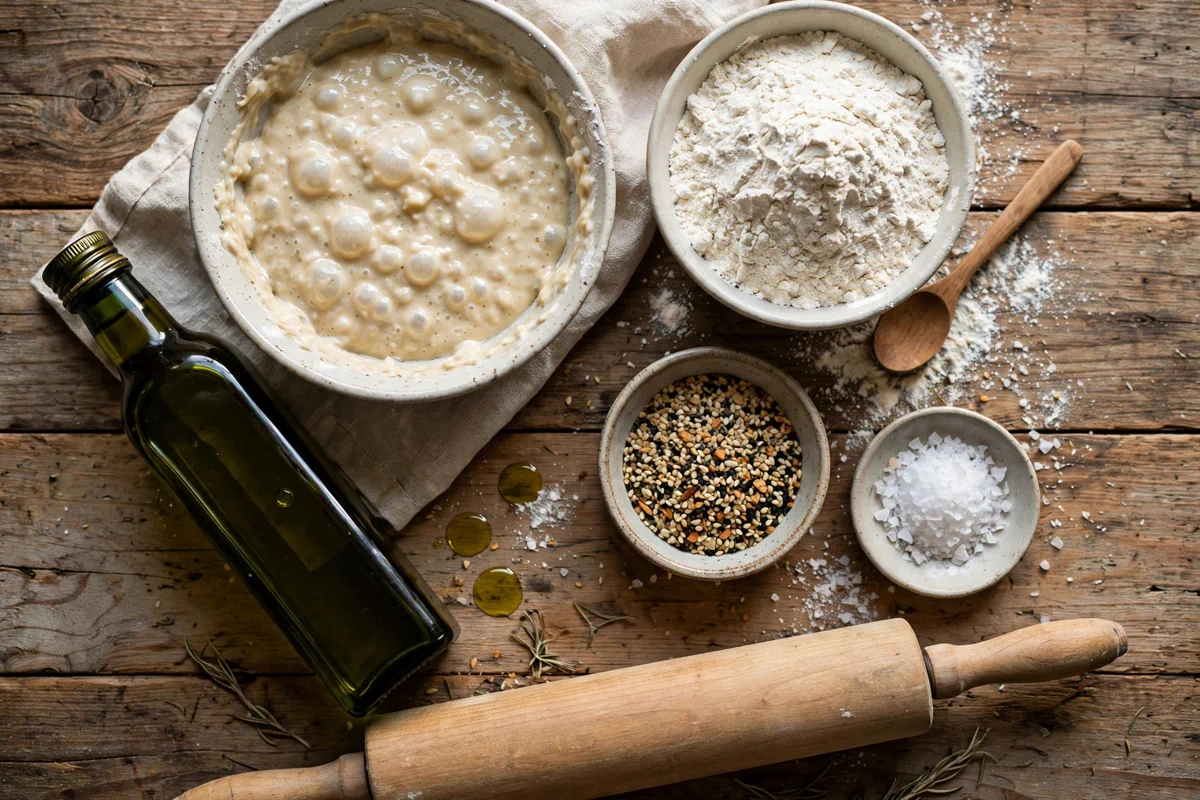
Here is an overview of what you will need for this recipe. Be sure to scroll down to the printable recipe card below for exact scaled measurements!
Sourdough discard
1 cupunfed, at room temperature
All-purpose flour
1 cupplus extra for dusting the work surface
Olive oil
0.25 cupplus 1 tbsp for brushing the tops
Fine salt
0.5 tspfor the dough
Everything bagel seasoning
2 tbsp1 tbsp in the dough, 1 tbsp on top
Flaky salt
0.5 tspfor sprinkling on top
Water
2 tbsponly if the dough feels dry and crumbly
How to Make (Step-by-Step Overview)
Here is a quick summary of the preparation process. Detailed cooking temperatures and step timers are included in the recipe card below.
1
Stir the sourdough discard, flour, olive oil, fine salt, and 1 tablespoon of everything bagel seasoning in a large bowl until a shaggy dough forms.
2
Knead the dough on a lightly floured surface for 2 minutes until it feels smooth and holds together, adding water 1 tablespoon at a time only if it cracks and will not come together.
3
Cover the dough with a clean towel and let it rest for 30 minutes. The rest relaxes the flour so the dough rolls thin without springing back.
4
Heat the oven to 350 degrees Fahrenheit and line two baking sheets with parchment paper.
5
Divide the dough in half. Roll one half on a floured surface until it is about 1/16 inch thick, turning it often so it does not stick.
6
Lift the rolled dough onto a lined baking sheet, brush the top lightly with olive oil, and sprinkle with half of the remaining everything bagel seasoning and half of the flaky salt.
7
Dock the dough all over with a fork, pressing firmly, then cut it into squares or rectangles with a pizza cutter or sharp knife.
8
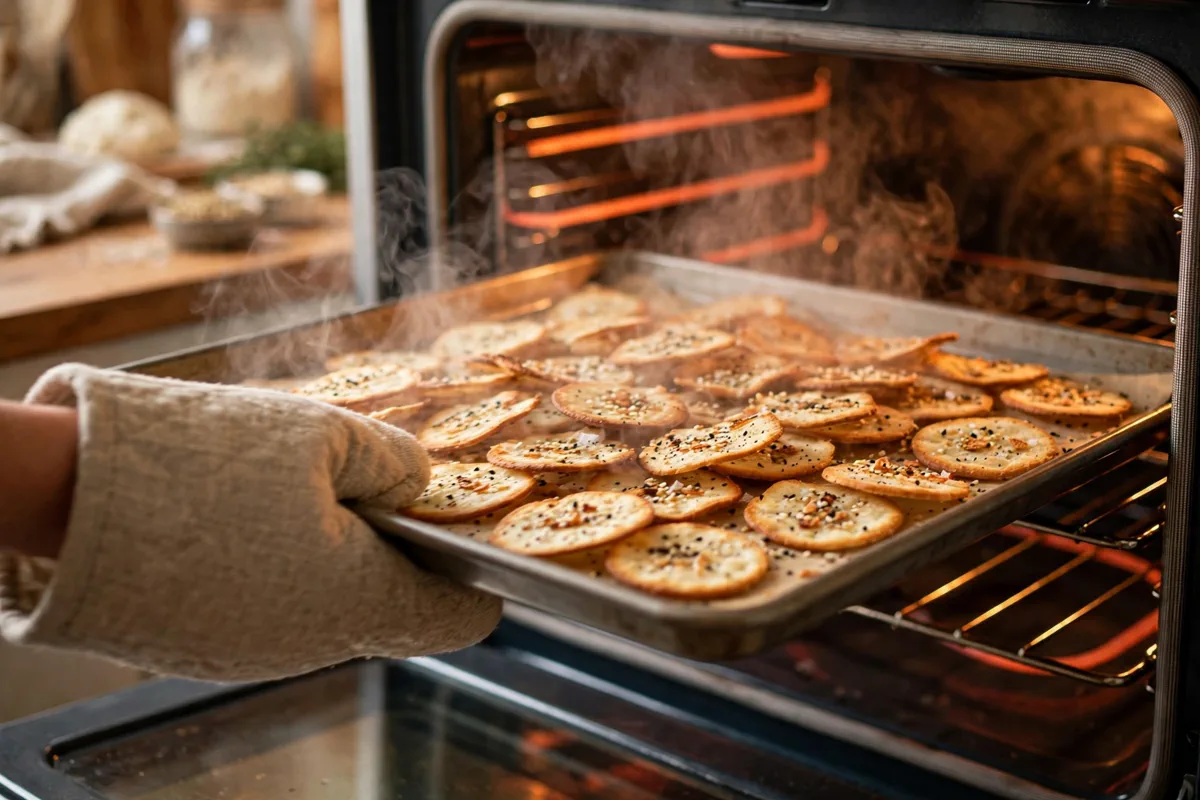
Bake for 20 to 22 minutes, until the crackers are golden at the edges and firm in the center. Pull the sheet out early if the edges brown fast, and snap off the done crackers.
9
Repeat rolling, seasoning, docking, and baking with the second half of the dough.
10
Cool the crackers fully on the baking sheets. They will turn fully crisp as they cool, so do not judge the crunch while they are still hot.
Our Pro Tips for Success
- •Let the discard come to room temperature for 20 minutes before mixing. Cold discard straight from the fridge makes a stiff dough that tears when you roll it.
- •Roll the dough until you can almost see the baking sheet through it, about 1/16 inch thick. Crackers rolled thicker than that bake up chewy in the middle instead of crisp.
- •Dock the dough all over with a fork before baking. The holes stop big air pockets from puffing the sheet up like a pillow.
- •Check the edges at 18 minutes. The outer crackers brown first, so pull the sheet out, snap off the done ones, and return the paler middle pieces for 3 to 4 more minutes.
- •Season the tops after brushing, not before. The oil acts like glue, so the seeds stay on the cracker instead of falling off in the container.
Storage & Make-Ahead Instructions
Refrigerator:Store leftovers in an airtight container for up to 3 to 4 days.
Freezer:Freeze in freezer-safe containers or bags for up to 2 months. Thaw overnight in the fridge.
Reheating:Reheat gently in a 350°F oven or covered skillet with a splash of broth until heated through.
Interactive Kitchen Assistant Live Smart Scaler
Our Recipe Precision Calculators
Calculate exact roasting times, internal temperatures, brining ratios, and safe thaw windows.
2.5 lbs (1.13 kg)
Recommended Timing & Thermals
Est. Cook Time45 mins
Rest Period7 mins
Pull From Heat160°F (71°C)
Final Carryover165°F (74°C)
Insert meat thermometer into thickest center without touching bone for 100% juicy safety.
Sourdough discard crackers are thin, crisp crackers made from unfed sourdough starter that would otherwise be thrown away at feeding time. The discard gives them a mild tang and helps them bake up crackly, while everything bagel seasoning on top gives each cracker a salty, garlicky, seedy crunch. They roll out like a simple dough, bake in about 20 minutes, and come out snappy enough to hold a dip without bending.
Why discard works so well here
Feeding a starter means pouring off part of it before adding fresh flour and water. That poured-off part is the discard, and most of the time it goes down the drain or into the trash. It still has flour, water, and active cultures in it, which is exactly what a cracker dough needs. You are not asking it to rise a loaf, so it does not matter that it is past its peak. The tang it carries is the whole point. It gives the crackers a depth that plain flour and water doughs do not have, and it does it without any extra step.
The other thing discard does is help the texture. A dough made only from flour and water can bake up hard and flat. Discard brings a little acidity and a little life to the mix, and the crackers come out with small blisters and a snap that feels more like a bought cracker than a piece of dried dough. If your starter is strong and well fed on a regular schedule, your discard will taste pleasantly sour. If your starter has been ignored for weeks, taste the discard first. A sharp, acetone smell means it has gone too far, and no amount of seasoning will fix that batch.
Getting the dough right
This dough is simple on purpose. Discard, flour, oil, salt, and seasoning go into one bowl and get stirred until they hold together. The amount of water you need depends on how thick your discard is. Some starters are runny, almost like pancake batter. Others are stiff enough to hold a spoon upright. That is why the water is listed as optional. Start without it. If the dough comes together and feels smooth after a short knead, you are done. If it cracks at the edges and refuses to form a ball, add water a tablespoon at a time until it cooperates.
The 30 minute rest matters more than it looks. Freshly mixed dough fights back when you roll it. It shrinks, it tears, and it springs back to a thick round no matter how hard you press. Resting lets the flour hydrate and the gluten relax, so the dough stays where you put it. Use that time to line your baking sheets and heat the oven. There is nothing else to prep, which is part of why this recipe fits into a normal afternoon without planning.
Rolling thin without tearing
Thin is the whole game with crackers. A dough rolled to 1/8 inch will bake into something closer to a flatbread. It will taste fine, but it will not snap. Aim for about 1/16 inch, thin enough that you can almost see the counter through it. Roll from the center outward, turn the dough a quarter turn every few passes, and dust lightly with flour if it sticks. If a tear opens up, press the edges back together with your fingers and keep rolling. The crackers get cut into pieces anyway, so a patched spot will never show.
Rolling directly onto parchment is another option worth trying. You roll the dough on the sheet itself, then slide the whole sheet onto the baking tray. That skips the risky transfer step where a thin sheet can stretch or fold over itself. The trade-off is that you need a flat surface at counter height and a rolling pin that fits over the tray. Either method works. Pick the one that feels less stressful in your kitchen.
Docking is the step people skip, and then they wonder why their crackers puffed up. Prick the rolled dough all over with a fork, pressing firmly enough to go through. The holes let steam escape, so the sheet stays flat instead of ballooning into a pocket. Cut the dough into squares or rectangles after docking. A pizza cutter is fastest, but a sharp knife works too. The pieces do not need to be equal. Uneven pieces are part of the charm, and the smaller ones just bake a little faster.
The seasoning question
Everything bagel seasoning is a mix of sesame seeds, poppy seeds, dried garlic, dried onion, and salt. It was made for bagels, but it fits crackers perfectly because every piece gets a little of each flavor in one bite. Half of it goes into the dough, so the flavor runs through the cracker and not just on the surface. The other half goes on top with flaky salt, where it toasts in the oven and turns fragrant.
Brushing the tops with oil before seasoning is not optional if you want the seeds to stay put. Dry seeds on dry dough fall off the moment you pick a cracker up. A light brush of oil gives them something to hold onto, and it also helps the tops brown evenly. Do not pour the oil on. A pastry brush or even your fingertips with a thin coat is enough. Too much oil makes the tops greasy and the seasoning slides around instead of sticking.
If you cannot find everything bagel seasoning, you can mix your own from sesame seeds, poppy seeds, garlic flakes, onion flakes, and salt in roughly equal parts. It will not taste identical to a store blend, but it will be close, and you can adjust the garlic up or the salt down to suit your taste. What you should not do is swap in a wet topping. A sauce or a soft cheese on top before baking will make the crackers soggy. Save the soft toppings for serving time, when the crackers are already crisp.
What to serve them with
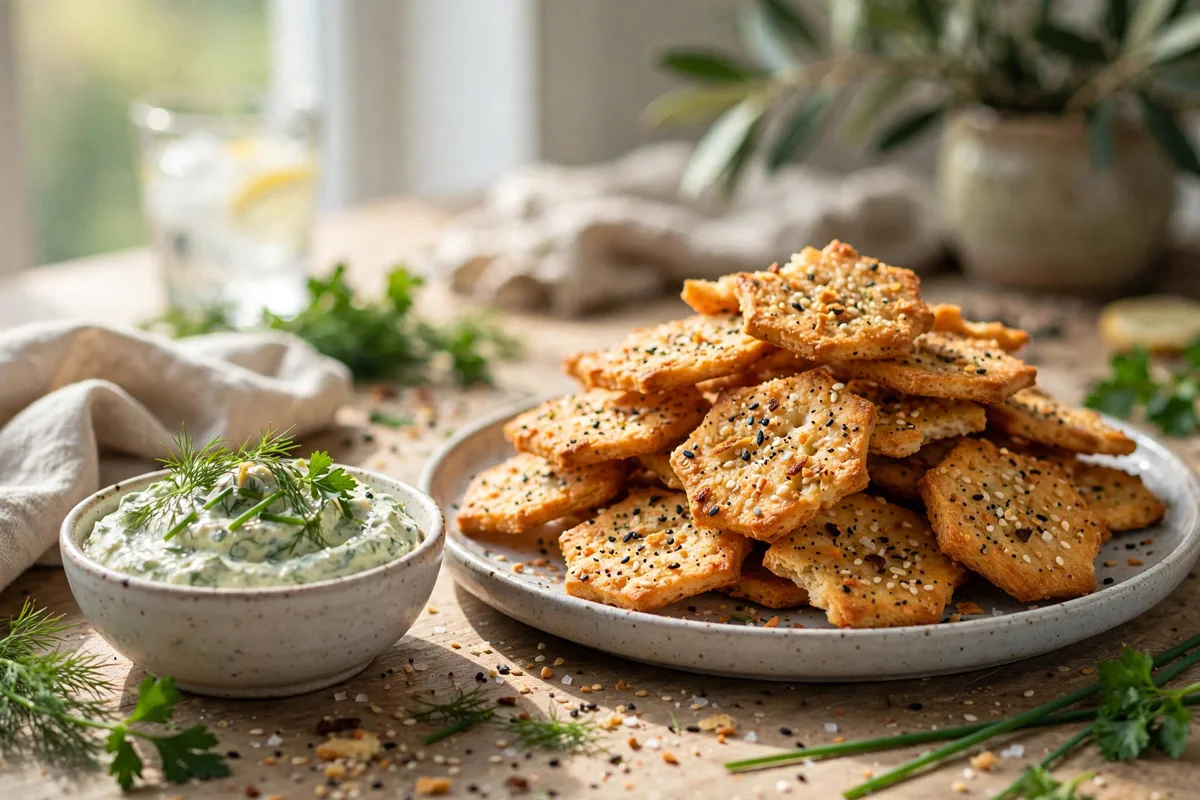
These crackers are sturdy enough for thick dips, which is more than you can say for most homemade crackers. They hold up under hummus, whipped feta, and herbed cream cheese without bending in half. They also work next to a cheese board, where the tang of the sourdough plays well against a sharp cheddar or a salty feta. For a simple snack, a bowl of them with a small dish of olive oil and a squeeze of lemon is enough.
They also travel well, which makes them useful for packed lunches and road trips. A container of crackers plus a small tub of dip is a snack that actually fills you up, unlike a bag of chips that disappears in five minutes. If you are making them for a party, double the recipe and bake the sheets one after another. The dough keeps fine at room temperature for a couple of hours while the first batch bakes, so there is no rush.
How they keep
Cool the crackers fully before storing them. Warm crackers trapped in a container release steam, and that steam is what turns a crisp cracker soft overnight. Once cool, they keep for up to 2 weeks in an airtight container at room temperature. Keep the container away from the stove and the sink, since humidity is the enemy here. If they do soften, a 300 degree oven for 5 minutes brings the crunch back. Let them cool again before eating, since the re-crisping only finishes as they cool.
Freezing is not worth it for this recipe. The crackers are so fast to make that a fresh batch beats a thawed one every time, and frozen crackers pick up fridge smells faster than you would expect. If you want a constant supply, make a double batch and store it in two containers, opening one at a time. That way the second container stays sealed and crisp until you need it.
Frequently Asked Questions
Yes, because unfed starter is exactly what this recipe is built for. Discard that has sat in the fridge for up to a week works fine, as long as it smells tangy and not like nail polish remover.
No, and that is the most common reason for soft crackers. Roll the dough as thin as you can manage, dock it well, and let the crackers cool fully on the sheet, since they crisp up as they cool.
Easy Chicken Recipes • Official Card
Sourdough Discard Crackers with Everything Seasoning
☆☆☆☆☆0.0 (0 reviews)•Recipe by Cooking With Guru Editorial Team•Updated: Jan 15, 2025
Thin, crisp sourdough discard crackers with everything seasoning. Zero-waste baking, ready in about an hour, perfect with dip.
Prep Time40 mins
Cook Time22 mins
Total Time62 mins
Adjust Servings:
8
Ingredients
Click to check off1 cup Sourdough discard(unfed, at room temperature)
1 cup All-purpose flour(plus extra for dusting the work surface)
1/4 cup Olive oil(plus 1 tbsp for brushing the tops)
1/2 tsp Fine salt(for the dough)
2 tbsps Everything bagel seasoning(1 tbsp in the dough, 1 tbsp on top)
1/2 tsp Flaky salt(for sprinkling on top)
2 tbsps Water(only if the dough feels dry and crumbly)
Instructions
Step-by-StepStir the sourdough discard, flour, olive oil, fine salt, and 1 tablespoon of everything bagel seasoning in a large bowl until a shaggy dough forms.
Knead the dough on a lightly floured surface for 2 minutes until it feels smooth and holds together, adding water 1 tablespoon at a time only if it cracks and will not come together.
Cover the dough with a clean towel and let it rest for 30 minutes. The rest relaxes the flour so the dough rolls thin without springing back.
Heat the oven to 350 degrees Fahrenheit and line two baking sheets with parchment paper.
Divide the dough in half. Roll one half on a floured surface until it is about 1/16 inch thick, turning it often so it does not stick.
Lift the rolled dough onto a lined baking sheet, brush the top lightly with olive oil, and sprinkle with half of the remaining everything bagel seasoning and half of the flaky salt.
Dock the dough all over with a fork, pressing firmly, then cut it into squares or rectangles with a pizza cutter or sharp knife.
Bake for 20 to 22 minutes, until the crackers are golden at the edges and firm in the center. Pull the sheet out early if the edges brown fast, and snap off the done crackers.
Repeat rolling, seasoning, docking, and baking with the second half of the dough.
Cool the crackers fully on the baking sheets. They will turn fully crisp as they cool, so do not judge the crunch while they are still hot.
CWG
Recipe Source
The Cooking With Guru Team
Our recipes are developed and checked by the Cooking With Guru team. Nutrition figures are estimates calculated from USDA data, and yields scale with the built-in portion tools so the recipe fits your kitchen.
More baking recipes to try!
🍽️
Turkish Menemen: One-Pan Eggs in Spicy Tomato Sauce
🍽️
High-Protein Cottage Cheese Egg Bake with Spinach
🍽️
Easy Chicken Congee Recipe with Crispy Garlic and Chili Oil
Comments & Questions (0)
Join the conversationNo comments yet!
Be the first to leave a comment or ask a question about Sourdough Discard Crackers with Everything Seasoning.