🍽️

Prep time30 mins
Cook time10 mins
Ingredients13
baking
Christmas Sugar Cookies
Published: Jan 15, 2025
Cut-out Christmas sugar cookies with soft centers and crisp edges — a dough that holds its shape, plus a simple icing that sets firm for decorating.
Cut-out Christmas sugar cookies with soft centers and crisp edges — a dough that holds its shape, plus a simple icing that sets firm for decorating.
If you are looking for an ultra-satisfying, restaurant-quality meal that comes together with minimal effort, this Christmas Sugar Cookies is about to become your new favorite. Everything is cooked to juicy, golden perfection with wholesome ingredients and incredible depth of flavor.
One simple tip!
Chill the dough for the full 60 minutes, and chill the cut shapes on the baking sheet for 10 minutes before they go in the oven. Cold dough spreads far less than warm dough, and that is the whole secret to sharp trees and stars.
Step-by-Step Photos


Why You’ll Love This Recipe
Quick & EffortlessReady in just 100 minutes total with straightforward, foolproof prep.
Packed with Deep FlavorCarefully balanced with unsalted butter, granulated sugar, large egg for maximum satisfaction.
Family & Crowd FriendlyMakes 24 generous servings that can be effortlessly doubled or scaled using our smart scaler.
Made From ScratchReal ingredients and straightforward home cooking, with no shortcuts on flavor.
Ingredients Notes & Variations
Here is an overview of what you will need for this recipe. Be sure to scroll down to the printable recipe card below for exact scaled measurements!
unsalted butter
1 cupsoftened to room temperature, cut into pieces
granulated sugar
1 cuplarge egg
1 pieceroom temperature
vanilla extract
1.5 tspfor the dough
almond extract
0.5 tspoptional, but it gives the cookies their bakery flavour
all-purpose flour
3 cupspooned and levelled, plus a little extra for dusting the counter
baking powder
1.5 tspfine salt
0.5 tsppowdered sugar
2 cupfor the icing, sifted
whole milk
3 tbspfor the icing, plus more by the teaspoon if needed
vanilla extract
0.5 tspfor the icing
gel food coloring
1 to tasteoptional, a few drops per bowl of icing
sprinkles
2 tbspoptional, for decorating
How to Make (Step-by-Step Overview)
Here is a quick summary of the preparation process. Detailed cooking temperatures and step timers are included in the recipe card below.
Beat the softened butter and granulated sugar in a large bowl for 3 minutes, until pale, fluffy, and noticeably lighter in colour.
Beat in the egg, the vanilla extract, and the almond extract until the mixture looks smooth and combined.
Whisk the flour, baking powder, and salt together in a separate bowl.
Add the dry ingredients to the butter mixture in two parts, mixing on low after each one, until the dough comes together and no dry flour is showing.
Divide the dough in half, flatten each half into a disc about 1 inch thick, wrap in cling film, and chill for 60 minutes.
Heat the oven to 350 F (175 C) and line two baking sheets with parchment paper.
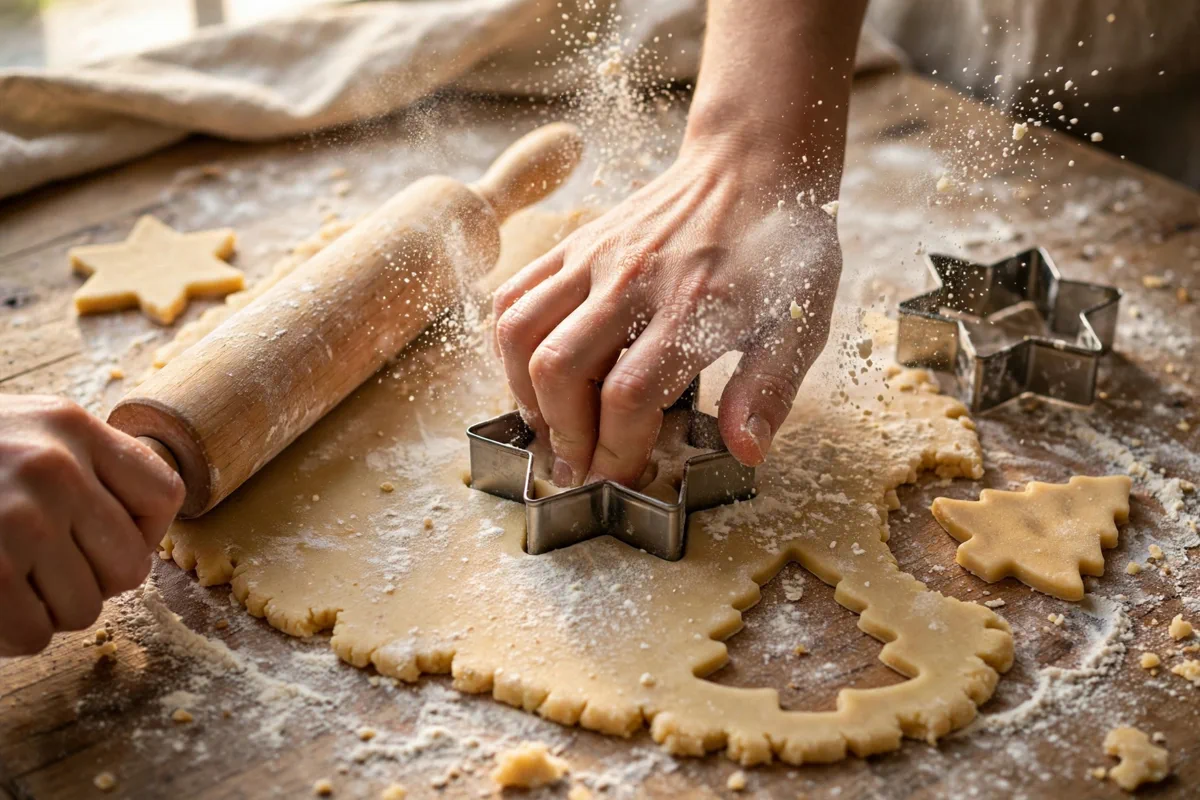
Roll one disc out on a lightly floured surface to 1/4 inch thick, turning the dough a quarter turn after every few rolls so it does not stick.
Cut out shapes with cookie cutters and place them on the prepared sheets about 1 inch apart.
Bake one sheet at a time for 9 to 11 minutes, until the edges look set and the bottoms are just starting to turn golden. The tops will still look pale.
Leave the cookies on the baking sheet for 5 minutes, then move them to a wire rack to cool completely before icing.
Whisk the powdered sugar, milk, and vanilla for the icing in a bowl until smooth. It should flow slowly off a spoon and settle flat in about 10 seconds.
Divide the icing into small bowls, tint each one with a few drops of food coloring, then spread or pipe it onto the cooled cookies and add sprinkles while the icing is still wet.
Leave the iced cookies uncovered at room temperature for 2 hours, until the icing is fully set and dry to the touch, before stacking or packing.
Our Pro Tips for Success
- •Chill the dough for the full 60 minutes, and chill the cut shapes on the baking sheet for 10 minutes before they go in the oven. Cold dough spreads far less than warm dough, and that is the whole secret to sharp trees and stars.
- •Roll the dough to a full 1/4 inch thick. Thinner cookies bake crisp all the way through and lose their soft centers, and they also brown faster around the edges.
- •Do not overbake. The cookies are done when the edges look set and the bottoms are just starting to turn golden. The tops will still look pale, and that is right. They firm up as they cool.
- •Test the icing on one cookie before you ice the whole batch. It should flow slowly off a spoon and settle smooth in about 10 seconds. If it runs off the edges, whisk in more powdered sugar a spoonful at a time. If it sits in stiff ridges, add milk half a teaspoon at a time.
- •Re-roll the scraps once, and only once. Dough that gets rolled a third time turns tough, and the cookies bake up hard instead of tender. If you have leftover scraps after the second roll, press them into a small disc and bake them as plain rounds.
Storage & Make-Ahead Instructions
Refrigerator:Store leftovers in an airtight container for up to 3 to 4 days.
Freezer:Freeze in freezer-safe containers or bags for up to 2 months. Thaw overnight in the fridge.
Reheating:Reheat gently in a 350°F oven or covered skillet with a splash of broth until heated through.
Interactive Kitchen Assistant Live Smart Scaler
Our Recipe Precision Calculators
Calculate exact roasting times, internal temperatures, brining ratios, and safe thaw windows.
2.5 lbs (1.13 kg)
Recommended Timing & Thermals
Est. Cook Time45 mins
Rest Period7 mins
Pull From Heat160°F (71°C)
Final Carryover165°F (74°C)
Insert meat thermometer into thickest center without touching bone for 100% juicy safety.
Christmas sugar cookies are cut-out butter cookies: soft in the middle, firm at the edges, made to be iced and decorated. The dough is rolled flat, cut into trees, stars, and snowflakes, baked until the edges just set, and finished with a simple powdered-sugar icing that dries firm enough to stack. This version is built around one thing: the shapes stay sharp in the oven. A tree should still look like a tree when it comes out.
That sounds obvious, but it is where most sugar cookie recipes fall apart. The dough goes in looking like a star and comes out looking like a blob, and the decorating never saves it. The fix is cold dough, the right amount of baking powder, and an oven that is fully hot before the tray goes in.
Why this dough holds its shape
Three things keep a cut-out cookie from spreading. The first is cold butter that stays cold. When the dough goes into a hot oven, the butter melts slowly, and the cookie sets around it before it can run. When the dough goes in warm, the butter melts fast, the cookie slumps, and the points of the star round off. That is why this recipe chills the dough for a full hour and then chills the cut shapes again on the tray. It feels like waiting for nothing. It is the whole recipe.
The second is the baking powder. It sounds like more would make a taller, puffier cookie, but too much leavening pushes the dough outward as it rises, and the edges spread. One and a half teaspoons across three cups of flour is enough lift to keep the cookies tender without pushing them sideways. Measure it properly. A heaped spoon changes the result.
The third is the flour itself. Three cups, spooned into the measuring cup and levelled off, gives a dough that is soft but not sticky. If you scoop the flour straight from the bag, you pack in more than you think, and the cookies come out dry and floury. Spoon it in, level it with a knife, and the dough will feel right: smooth, a little soft, and easy to roll without cracking at the edges.
Rolling and cutting without the fight
Roll the dough to a full 1/4 inch thick. This is not a place to go thin. A thinner cookie bakes crisp all the way through, loses its soft center, and browns too fast around the points. A 1/4 inch cookie stays soft inside and holds a clean edge.
Flour the surface lightly, and flour the rolling pin too, but do not go heavy. Extra flour worked into the dough makes the cookies tough. If the dough starts sticking, lift it, dust a little more flour underneath, and carry on. Rolling the dough between two sheets of parchment skips the flour problem entirely, and it makes the cut shapes easy to lift. Peel the top sheet off, cut, and lift the shapes with a thin spatula.
Cut the shapes close together to get the most cookies out of each roll. Then gather the scraps, press them back together, and roll them once more. One re-roll is fine. A second re-roll overworks the dough and the cookies bake up hard. If you still have scraps left after that, press them into a small disc, cut a few plain rounds, and bake them for snacking. They taste the same.
Chill the cut shapes on the baking sheet for 10 minutes before they go in the oven. This is the step people skip, and it is the one that saves the sharp corners. While the oven heats, the tray sits in the fridge, the butter firms up again, and the cookies go in cold.
The icing that actually sets
This icing is three things: powdered sugar, milk, and vanilla. No egg white, no meringue powder, nothing that needs cooking. It dries firm and smooth, it holds sprinkles, and it stacks without smearing once it has had its two hours. The trick is the consistency, and it is worth getting right before you touch a cookie.
Start with the three tablespoons of milk in the recipe. Whisk everything together and lift the spoon. The icing should flow off in a slow ribbon and settle flat in about 10 seconds. If it pours off fast like water, it is too thin, and it will run off the edges of the cookies. Whisk in more powdered sugar, a spoonful at a time. If it sits in stiff ridges and does not settle, it is too thick, and it will dry lumpy. Add milk, half a teaspoon at a time, until it flows.
Divide the icing into small bowls and tint each one with gel food coloring. Gel coloring is better than liquid here because it does not thin the icing. A few drops go a long way, so start with less than you think.
Spread the icing with the back of a small spoon or a butter knife, right up to the edge, and let it settle for a few seconds. It smooths itself out. If you are piping, use a zip-top bag with a tiny corner snipped off. It works just as well as a piping bag and there is nothing to wash after.
Decorating without the mess
Sprinkles go on while the icing is wet. If you wait until it starts to set, they bounce off and roll onto the table. Work in small batches: ice four or five cookies, sprinkle them, then ice the next few. It keeps the pace calm and the sprinkles where they belong.
Let kids do the decorating on a tray lined with parchment. The mess stays on the tray, the tray goes in the bin, and the table stays clean. Give each person one color of icing and one kind of sprinkle, and the cookies will look better than a tray where everyone grabbed everything at once.
What goes wrong, and the fix
Spreading is the most common problem, and the answer is almost always temperature. Chill the dough, chill the cut shapes, and make sure the oven is fully hot before the tray goes in. Baking sheets that are still warm from the last batch will melt the butter on contact, so let them cool between batches, or rotate two sheets.
Tough cookies come from overworking the dough. Once the flour goes in, mix only until it comes together. If you keep mixing after that, the dough gets dense and the cookies bake up hard. The same goes for re-rolling: once is fine, twice is too much.
Icing that will not set is usually icing that was too thin, or a kitchen that is too humid. If the icing feels tacky after two hours, leave the cookies uncovered overnight. Do not stack them while they are still soft, or they will stick together and peel. If the icing cracked as it dried, it was too thick. Thin it a little next time and the surface will stay smooth.
Burnt bottoms with pale tops mean the oven rack is too low. Move the tray to the middle rack and check the cookies a minute earlier next time.
Swaps that work
Salted butter can replace the unsalted butter. Leave out the added salt in that case, and the cookies will taste the same. A dairy-free butter made for baking works too, though the cookies spread a little more, so chill the cut shapes for the full 10 minutes.
Leave out the almond extract if you do not have it. The cookies lose a little of their bakery flavour, but nothing else changes.
For a gluten-free version, use a one-to-one gluten-free flour blend with xanthan gum already in it. The dough will feel softer and may need an extra 15 minutes in the fridge before rolling. The cookies will be a little more delicate when warm, so leave them on the tray for the full 5 minutes before moving them.
Storing and freezing
Undecorated cookies keep in an airtight container at room temperature for up to a week, with a sheet of parchment between layers. Iced cookies keep the same way, once the icing has fully set, for up to 5 days. Keep them away from heat and damp, and the icing stays firm.
The dough freezes well. Wrap the discs tightly in cling film, then put them in a freezer bag, and they keep for up to 3 months. Thaw overnight in the fridge, then let the dough sit on the counter for 10 minutes before rolling so it does not crack. Baked, undecorated cookies also freeze well for up to 3 months; thaw them at room temperature for an hour before icing.
Frequently Asked Questions
The dough was too warm when it went in the oven. Chill the dough for 60 minutes before rolling, then chill the cut shapes on the baking sheet for 10 minutes before baking. Soft butter and a warm kitchen are the usual cause, so keep the dough cold right up to the bake.
About 2 hours at room temperature. The icing feels dry to a light touch after 30 to 40 minutes, but it needs the full 2 hours before the cookies can be stacked or packed. If the kitchen is humid, give it an extra hour.
Easy Chicken Recipes • Official Card
Christmas Sugar Cookies
☆☆☆☆☆0.0 (0 reviews)•Recipe by Cooking With Guru Editorial Team•Updated: Jan 15, 2025
Cut-out Christmas sugar cookies with soft centers and crisp edges — a dough that holds its shape, plus a simple icing that sets firm for decorating.
Prep Time30 mins
Cook Time10 mins
Total Time100 mins
Adjust Servings:
24
Ingredients
Click to check off1 cup unsalted butter(softened to room temperature, cut into pieces)
1 cup granulated sugar
1 piece large egg(room temperature)
1 1/2 tsps vanilla extract(for the dough)
1/2 tsp almond extract(optional, but it gives the cookies their bakery flavour)
3 cups all-purpose flour(spooned and levelled, plus a little extra for dusting the counter)
1 1/2 tsps baking powder
1/2 tsp fine salt
2 cups powdered sugar(for the icing, sifted)
3 tbsps whole milk(for the icing, plus more by the teaspoon if needed)
1/2 tsp vanilla extract(for the icing)
1 to taste gel food coloring(optional, a few drops per bowl of icing)
2 tbsps sprinkles(optional, for decorating)
Instructions
Step-by-Step0
0
0
0
0
0
0
0
CWG
Recipe Source
The Cooking With Guru Team
Our recipes are developed and checked by the Cooking With Guru team. Nutrition figures are estimates calculated from USDA data, and yields scale with the built-in portion tools so the recipe fits your kitchen.
More baking recipes to try!
🍽️
Turkish Menemen: One-Pan Eggs in Spicy Tomato Sauce
🍽️
High-Protein Cottage Cheese Egg Bake with Spinach
🍽️
Easy Chicken Congee Recipe with Crispy Garlic and Chili Oil
Comments & Questions (0)
Join the conversationNo comments yet!
Be the first to leave a comment or ask a question about Christmas Sugar Cookies.