🍽️
Prep time15 mins
Cook time25 mins
Ingredients14
lunch
Instant Pot Butternut Squash and Apple Soup
Published: Jan 15, 2025
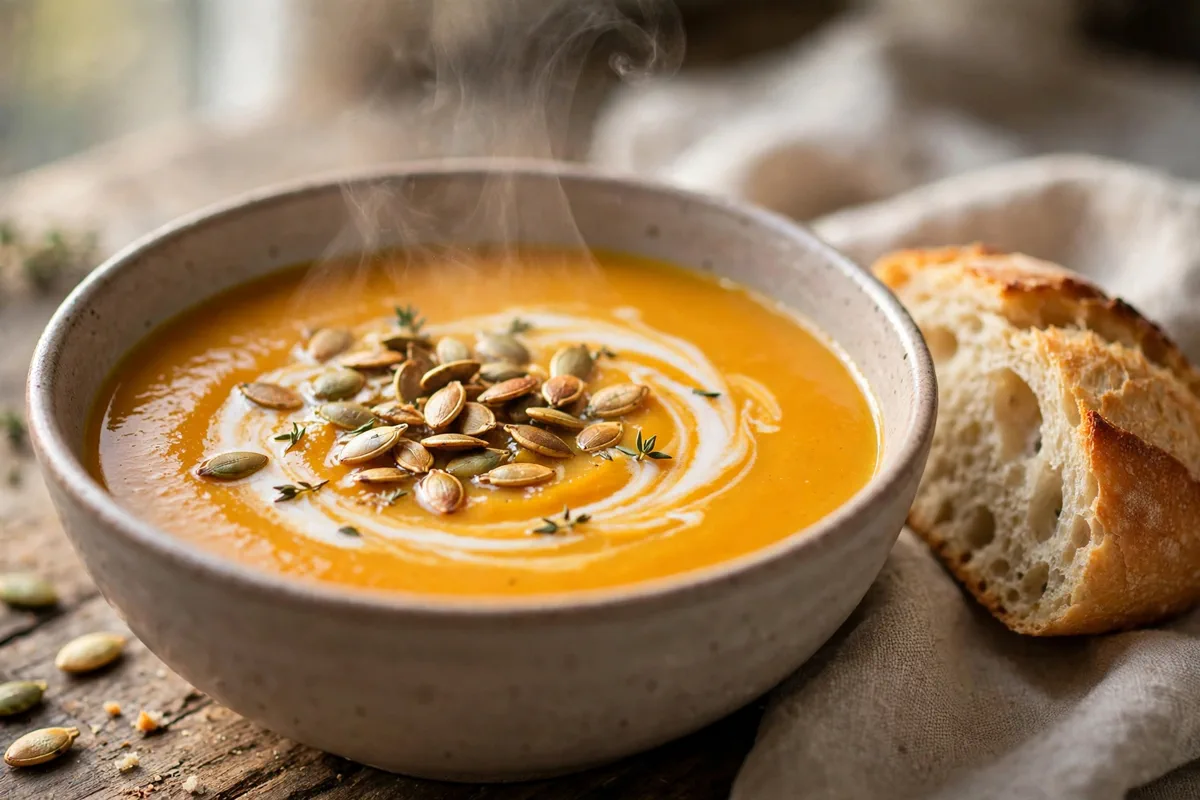
Silky butternut squash and apple soup, pressure-cooked in the Instant Pot in 10 minutes and blended with coconut milk and ginger. Dairy-free.
Silky butternut squash and apple soup, pressure-cooked in the Instant Pot in 10 minutes and blended with coconut milk and ginger. Dairy-free.
If you are looking for an ultra-satisfying, restaurant-quality meal that comes together with minimal effort, this Instant Pot Butternut Squash and Apple Soup is about to become your new favorite. Everything is cooked to juicy, golden perfection with wholesome ingredients and incredible depth of flavor.
One simple tip!
Cut the squash into even 1-inch cubes. Big chunks next to small ones cook unevenly, and the small ones turn to mush while the big ones stay firm in the middle.
Step-by-Step Photos
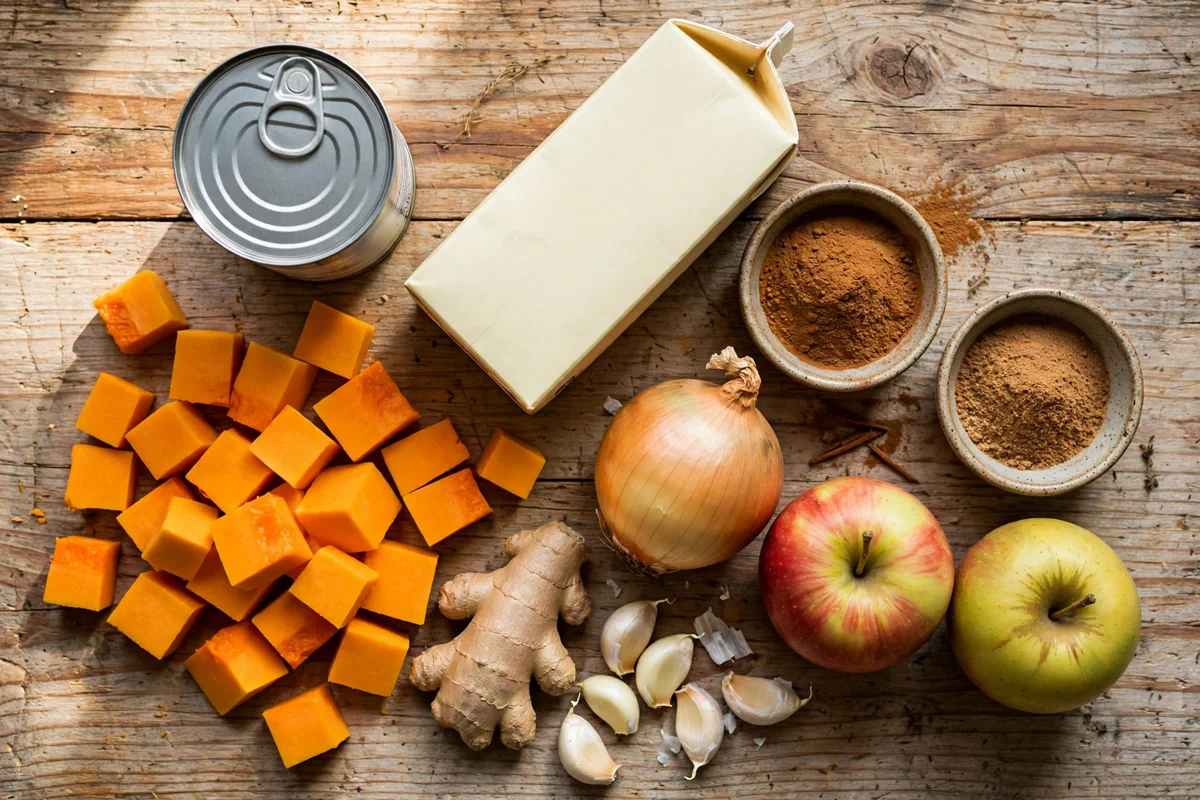
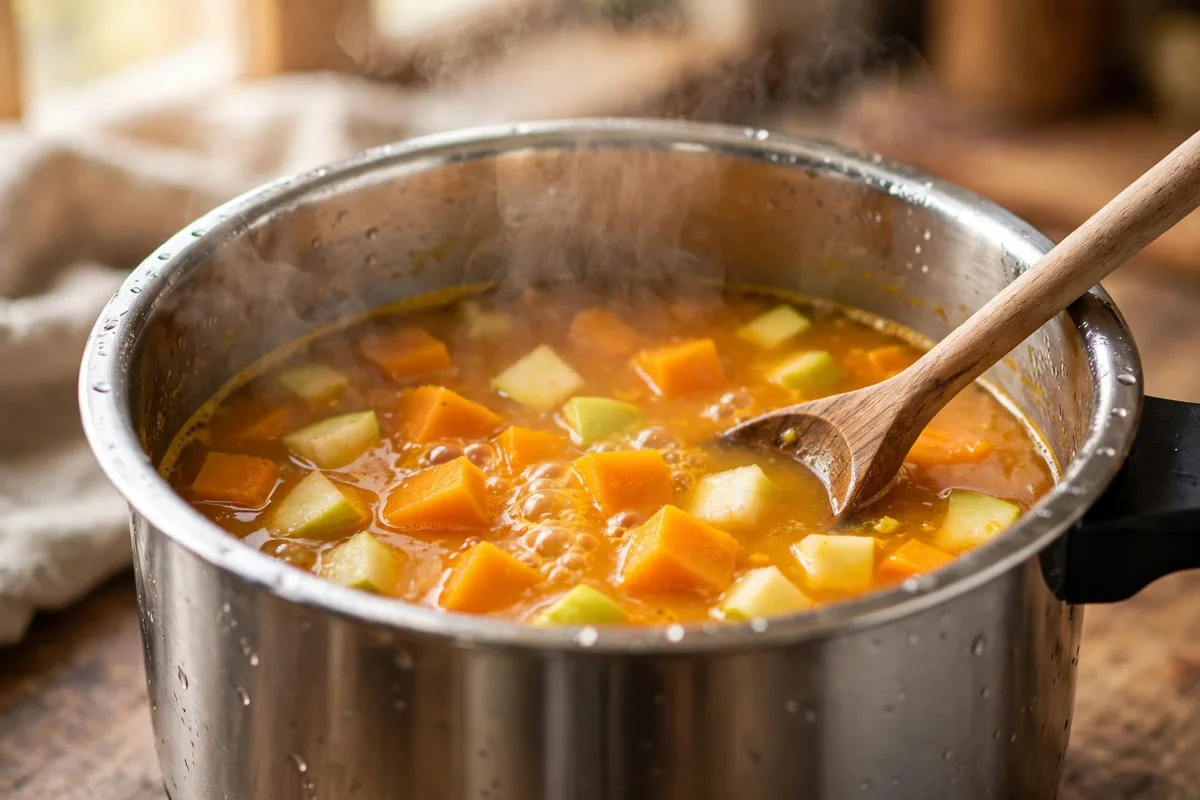
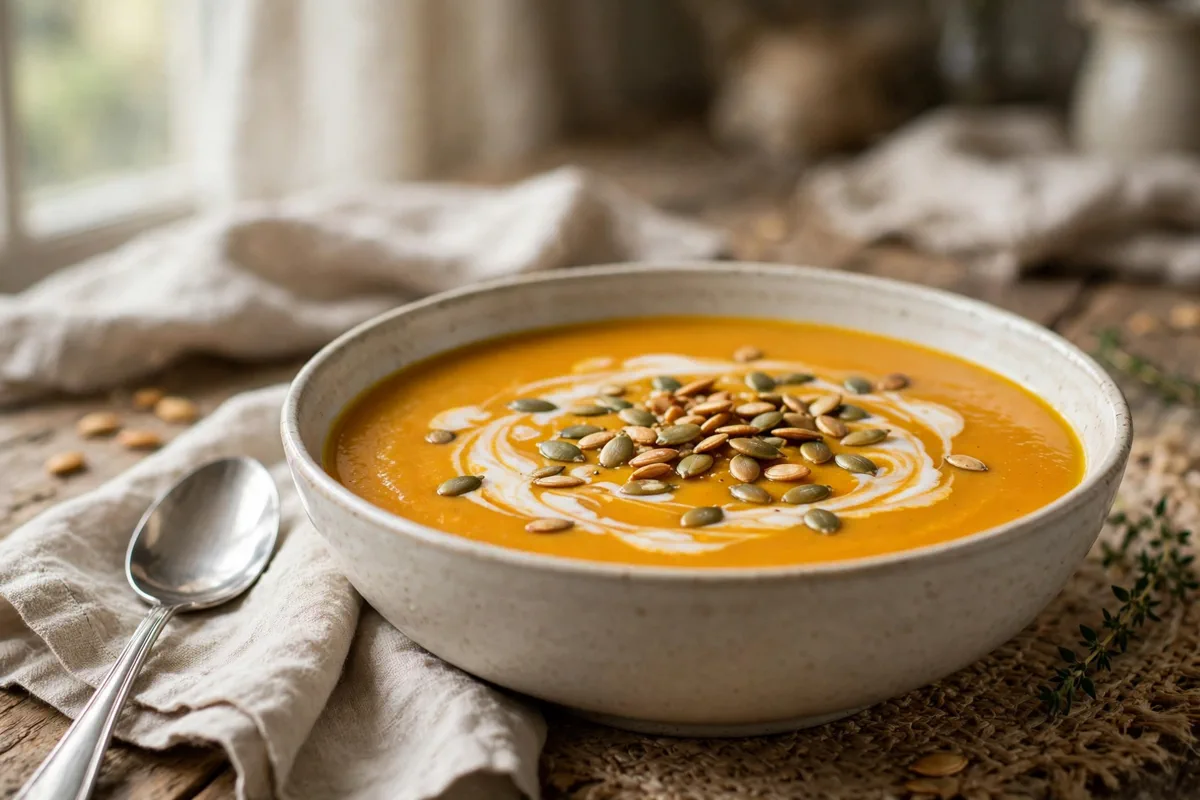
Why You’ll Love This Recipe
Quick & EffortlessReady in just 40 minutes total with straightforward, foolproof prep.
Packed with Deep FlavorCarefully balanced with butternut squash, apple, yellow onion for maximum satisfaction.
Family & Crowd FriendlyMakes 6 generous servings that can be effortlessly doubled or scaled using our smart scaler.
Made From ScratchReal ingredients and straightforward home cooking, with no shortcuts on flavor.
Ingredients Notes & Variations
Here is an overview of what you will need for this recipe. Be sure to scroll down to the printable recipe card below for exact scaled measurements!
butternut squash
1.5 lbpeeled, seeded, and cut into 1-inch cubes; about 6 cups
apple
2 pieceHoneycrisp or Gala, peeled, cored, and diced
yellow onion
1 piecepeeled and diced
garlic
3 piececloves, minced
fresh ginger
1 tbsppeeled and grated
vegetable broth
3 cuplow-sodium
coconut milk
1 cupfull-fat, from a can, shaken well
olive oil
1 tbspground cinnamon
0.5 tspground nutmeg
0.25 tspsalt
1 tspplus more to taste
black pepper
0.5 tspfreshly ground
maple syrup
1 tbspoptional, only if your apples are tart
pumpkin seeds
0.25 cuptoasted pepitas, for topping
How to Make (Step-by-Step Overview)
Here is a quick summary of the preparation process. Detailed cooking temperatures and step timers are included in the recipe card below.
1
Set the Instant Pot to sauté on normal heat and add the olive oil. When the oil shimmers, after about 1 minute, add the diced onion and cook for 3 minutes, stirring now and then, until the edges turn translucent and soft.
2
Add the garlic, grated ginger, cinnamon, and nutmeg. Stir for 30 seconds until the garlic smells fragrant and the spices darken a shade. Do not let the garlic brown, or it will taste bitter in the finished soup.
3
Pour in the vegetable broth and scrape the bottom of the pot with a wooden spoon to lift up any browned bits stuck there. Those bits carry a lot of flavor, and scraping now also stops the pot from flashing a burn warning later.
4
Add the cubed butternut squash, diced apple, salt, and black pepper. Stir once so everything sits mostly under the broth. The pieces do not need to be fully covered; the steam in the sealed pot cooks what pokes above the liquid.
5
Lock the lid, set the valve to sealing, and pressure cook on high for 10 minutes. The pot will take about 10 minutes to come up to pressure first, so plan on roughly 20 minutes from the moment you lock the lid.
6
When the timer beeps, let the pressure release naturally for 10 minutes, then move the valve to venting to release the rest. Wait until the pin drops and the lid opens easily. Never force a lid that still feels stuck.
7
Open the lid and look at the squash. A cube should fall apart when you press it with the back of a spoon. If any pieces still hold their shape, lock the lid again and pressure cook for 2 more minutes.
8
Pour in the coconut milk and stir. Blend the soup right in the pot with an immersion blender for 1 to 2 minutes, moving it slowly in circles, until it turns completely smooth and coats the back of a spoon. If you see any flecks of squash skin, keep blending.
9
Taste and adjust. Add the maple syrup only if the soup tastes sharp from tart apples, a pinch more salt if it tastes flat, and a splash of broth if it is thicker than you like. The finished soup should pour in a slow ribbon, not plop off the spoon.
10
Ladle into bowls and finish each one with a swirl of coconut milk and a spoonful of toasted pumpkin seeds. Serve right away while the top is still warm and the seeds are crisp.
Our Pro Tips for Success
- •Cut the squash into even 1-inch cubes. Big chunks next to small ones cook unevenly, and the small ones turn to mush while the big ones stay firm in the middle.
- •Use a sweet apple, not a tart one. Honeycrisp and Gala melt into the soup and balance the squash. Granny Smith makes the soup sharp enough that you will need the maple syrup to fix it.
- •Do not skip the natural release. A quick release blows steam through the soup and can splatter hot liquid out of the valve. Ten minutes of natural release also gives the squash time to finish softening.
- •Blend longer than you think. An immersion blender needs a full 1 to 2 minutes to get this soup truly silky. Stop early and the texture turns grainy once it cools.
- •Season at the end, not before pressure cooking. Salt concentrates as liquid evaporates under pressure, so the same amount of salt can taste fine at the start and too salty at the finish.
Storage & Make-Ahead Instructions
Refrigerator:Store leftovers in an airtight container for up to 3 to 4 days.
Freezer:Freeze in freezer-safe containers or bags for up to 2 months. Thaw overnight in the fridge.
Reheating:Reheat gently in a 350°F oven or covered skillet with a splash of broth until heated through.
Interactive Kitchen Assistant Live Smart Scaler
Our Recipe Precision Calculators
Calculate exact roasting times, internal temperatures, brining ratios, and safe thaw windows.
2.5 lbs (1.13 kg)
Recommended Timing & Thermals
Est. Cook Time45 mins
Rest Period7 mins
Pull From Heat160°F (71°C)
Final Carryover165°F (74°C)
Insert meat thermometer into thickest center without touching bone for 100% juicy safety.
What this soup is
Instant Pot butternut squash and apple soup is a smooth, dairy-free soup made by pressure cooking cubed squash, sweet apple, onion, ginger, and broth for 10 minutes, then blending it with coconut milk. The apple softens the squash's earthiness and the ginger keeps the flavor from turning flat. It goes from raw ingredients to the table in about 40 minutes, and most of that time the pot works on its own while you do something else.
This is the soup to make when the squash on your counter feels like a project. Peeling and cubing takes 15 minutes, and after that the Instant Pot handles the rest. There is no roasting tray to wash, no oven to preheat, and no standing over a pot while it simmers. You lock the lid, wait, blend, and eat.
Why the Instant Pot works so well here
Butternut squash soup on the stove takes 25 to 30 minutes of simmering, and the squash at the bottom of the pot can scorch if you forget to stir. Under pressure, the same squash turns spoon-soft in 10 minutes, and the sealed pot keeps all the liquid in, so the flavor stays concentrated instead of steaming away. The apple goes in at the same time and cooks down completely, which matters: raw apple chunks in a blended soup taste sharp, but pressure-cooked apple melts into the background and reads as sweetness.
The 10-minute pressure time is real, but the full cook time is closer to 25 minutes once you count the pot coming up to pressure and the natural release. That is still faster than the stovetop, and the hands-on part is about 5 minutes of sautéing at the start. If you have ever skipped a squash soup because it sounded like an afternoon, this version is the fix.
Picking the squash and the apple
Look for a squash that feels heavy for its size with a matte, unblemished skin. A 1.5-pound squash gives you about 6 cups of cubes, which is the right amount for 3 cups of broth. If your squash is much bigger, save the extra cubes for roasting another day rather than cramming them into the pot. An overfilled pot takes longer to reach pressure and the squash on top cooks unevenly.
The apple choice matters more than most recipes admit. Honeycrisp and Gala are the right picks because they are sweet enough to balance the squash without added sugar. A tart apple like Granny Smith pushes the soup toward sharp, and you end up adding maple syrup to correct it. The maple syrup is in the ingredient list as an optional fix, not a requirement: taste the soup before you reach for it, and skip it entirely if your apples were sweet.
Peeling is the one fussy step. Cut the squash in half crosswise first, which gives you two short, stable pieces that are easy to hold, then peel each half with a regular vegetable peeler. A sharp peeler takes about 2 minutes. The skin does not soften under pressure, so leaving it on means tough flecks in an otherwise smooth soup, and no amount of blending fixes that.
What the soup should look like at each stage
After the sauté step, the onion should be soft and translucent with the spices smelling warm and a little sweet. If the garlic starts to brown, move on to the broth right away; browned garlic turns bitter and that bitterness survives blending. Pouring in the broth and scraping the bottom is not just cleanup. The browned bits stuck to the pot are concentrated flavor, and scraping them loose also stops the pot from flashing a burn warning once it seals.
When the pressure cycle finishes and you open the lid, the squash should look slumped and waterlogged, and a cube should fall apart under the back of a spoon. If a cube still holds its shape, the soup is not ready to blend. Lock the lid and give it 2 more minutes at pressure. Blending undercooked squash is the most common reason this soup turns grainy, and it is much easier to cook it a little longer than to fix the texture after.
After blending, the soup should coat the back of a spoon and pour in a slow ribbon. If it plops off the spoon in blobs, it is too thick: stir in broth a quarter cup at a time until it loosens. If it runs off the spoon like water, it is too thin, and the fix is to simmer it uncovered on sauté for 3 to 5 minutes so some liquid cooks off. Season only at this point. Salt concentrates under pressure, so a soup salted to taste before cooking can come out too salty after.
Blending it smooth
An immersion blender is the easiest tool here because you blend right in the pot and skip pouring hot soup into a jug. Move it slowly in circles for a full 1 to 2 minutes. The soup looks smooth after 30 seconds, but it is not; the last minute is what turns it from slightly grainy to truly silky, and that difference shows up once the soup cools a little in the bowl.
A countertop blender works too, but fill it only halfway and hold the lid down with a folded towel. Hot soup expands as it blends, and a full jug with a loose lid sprays. Blend in two batches and pour each back into the pot. Either way, taste a spoonful after blending and before serving: this is the moment to adjust salt, add the maple syrup if the apples were tart, or thin the soup with a splash of broth.
Serving it and making it a meal
The soup is complete on its own, but the toppings are what make it feel finished. A swirl of coconut milk on top looks good and adds a cool, rich note against the warm soup. Toasted pumpkin seeds add the crunch the soup otherwise lacks; toast them in a dry skillet for 2 to 3 minutes until they pop and smell nutty, and add them at the table so they stay crisp. Crusty bread beside the bowl turns it into a full lunch, and a simple green salad with a sharp dressing balances the soup's sweetness.
If you are serving this to people who eat dairy, a spoonful of sour cream or a crumble of feta on top works well, but the soup does not need it. The coconut milk already gives it body, and the soup is dairy-free and vegan as written, which makes it an easy dish to serve to a mixed table without cooking two versions.
Storing and reheating leftovers
This soup keeps well, which is half the point of making a full pot. It holds in the fridge for 5 days in sealed containers, and it freezes for up to 3 months. Freeze it in single portions so you can thaw exactly what you need, and leave the toppings out of the freezer entirely. Thaw overnight in the fridge, then reheat gently in a saucepan over medium-low heat for 5 to 7 minutes, stirring often. The soup thickens as it sits, so expect to add a splash of broth or water when you reheat. Do not bring it to a hard boil once the coconut milk is in; high heat can make coconut milk separate and look grainy.
Common mistakes and how to fix them
The most common mistake is blending too soon. If the soup tastes grainy or you can see tiny flecks, the squash was undercooked or under-blended. Cook it 2 minutes longer next time, and blend a full minute longer than feels necessary. The second most common mistake is over-salting before pressure cooking. Salt at the end, taste, and add a pinch at a time.
The third mistake is skipping the natural release and venting the pot right away. A quick release blows steam through the soup and can splatter hot liquid out of the valve, and it also stops the squash from finishing its softening. Ten minutes of natural release costs nothing and makes the soup better. If the soup tastes flat after all that, it usually needs salt, not more spice. Add a pinch, stir, wait 30 seconds, and taste again before adding more.
Frequently Asked Questions
Yes. Cook it in a large pot on the stove: sauté the onion and spices the same way, add everything except the coconut milk, cover, and simmer for 25 to 30 minutes until the squash falls apart, then blend and stir in the coconut milk. The stovetop version tastes the same; it just takes about 15 minutes longer.
Yes, peel it. The skin does not break down under pressure and stays in tough flecks even after blending. A vegetable peeler takes about 2 minutes on a 1.5-pound squash, and it is the only fussy part of this recipe.
Easy Chicken Recipes • Official Card
Instant Pot Butternut Squash and Apple Soup
☆☆☆☆☆0.0 (0 reviews)•Recipe by Cooking With Guru Editorial Team•Updated: Jan 15, 2025
Silky butternut squash and apple soup, pressure-cooked in the Instant Pot in 10 minutes and blended with coconut milk and ginger. Dairy-free.
Prep Time15 mins
Cook Time25 mins
Total Time40 mins
Adjust Servings:
6
Ingredients
Click to check off1.5 lb butternut squash(peeled, seeded, and cut into 1-inch cubes; about 6 cups)
2 piece apple(Honeycrisp or Gala, peeled, cored, and diced)
1 piece yellow onion(peeled and diced)
3 piece garlic(cloves, minced)
1 tbsp fresh ginger(peeled and grated)
3 cups vegetable broth(low-sodium)
1 cup coconut milk(full-fat, from a can, shaken well)
1 tbsp olive oil
1/2 tsp ground cinnamon
1/4 tsp ground nutmeg
1 tsp salt(plus more to taste)
1/2 tsp black pepper(freshly ground)
1 tbsp maple syrup(optional, only if your apples are tart)
1/4 cup pumpkin seeds(toasted pepitas, for topping)
Instructions
Step-by-StepSet the Instant Pot to sauté on normal heat and add the olive oil. When the oil shimmers, after about 1 minute, add the diced onion and cook for 3 minutes, stirring now and then, until the edges turn translucent and soft.
Add the garlic, grated ginger, cinnamon, and nutmeg. Stir for 30 seconds until the garlic smells fragrant and the spices darken a shade. Do not let the garlic brown, or it will taste bitter in the finished soup.
Pour in the vegetable broth and scrape the bottom of the pot with a wooden spoon to lift up any browned bits stuck there. Those bits carry a lot of flavor, and scraping now also stops the pot from flashing a burn warning later.
Add the cubed butternut squash, diced apple, salt, and black pepper. Stir once so everything sits mostly under the broth. The pieces do not need to be fully covered; the steam in the sealed pot cooks what pokes above the liquid.
Lock the lid, set the valve to sealing, and pressure cook on high for 10 minutes. The pot will take about 10 minutes to come up to pressure first, so plan on roughly 20 minutes from the moment you lock the lid.
When the timer beeps, let the pressure release naturally for 10 minutes, then move the valve to venting to release the rest. Wait until the pin drops and the lid opens easily. Never force a lid that still feels stuck.
Open the lid and look at the squash. A cube should fall apart when you press it with the back of a spoon. If any pieces still hold their shape, lock the lid again and pressure cook for 2 more minutes.
Pour in the coconut milk and stir. Blend the soup right in the pot with an immersion blender for 1 to 2 minutes, moving it slowly in circles, until it turns completely smooth and coats the back of a spoon. If you see any flecks of squash skin, keep blending.
Taste and adjust. Add the maple syrup only if the soup tastes sharp from tart apples, a pinch more salt if it tastes flat, and a splash of broth if it is thicker than you like. The finished soup should pour in a slow ribbon, not plop off the spoon.
Ladle into bowls and finish each one with a swirl of coconut milk and a spoonful of toasted pumpkin seeds. Serve right away while the top is still warm and the seeds are crisp.
CWG
Recipe Source
The Cooking With Guru Team
Our recipes are developed and checked by the Cooking With Guru team. Nutrition figures are estimates calculated from USDA data, and yields scale with the built-in portion tools so the recipe fits your kitchen.
More lunch recipes to try!
🍽️
Turkish Menemen: One-Pan Eggs in Spicy Tomato Sauce
🍽️
High-Protein Cottage Cheese Egg Bake with Spinach
🍽️
Easy Chicken Congee Recipe with Crispy Garlic and Chili Oil
Comments & Questions (0)
Join the conversationNo comments yet!
Be the first to leave a comment or ask a question about Instant Pot Butternut Squash and Apple Soup.