🍽️
Prep time15 mins
Cook time28 mins
Ingredients6
desserteasy
Spiced Poached Pears with Mascarpone
Published: Oct 21, 2026
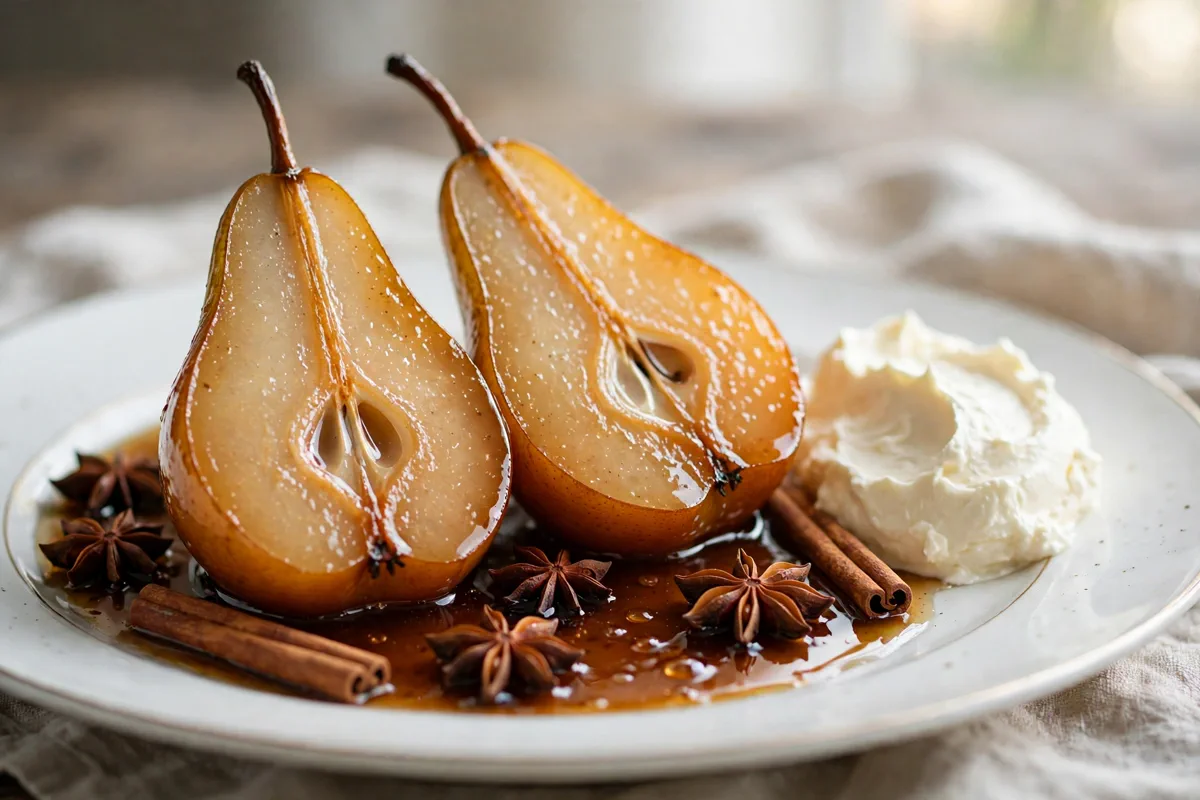
Tender pears simmered in cinnamon-star anise syrup with cool mascarpone — a five-ingredient dessert that looks like it took all afternoon.
Tender pears simmered in cinnamon-star anise syrup with cool mascarpone — a five-ingredient dessert that looks like it took all afternoon.
If you are looking for an ultra-satisfying, restaurant-quality meal that comes together with minimal effort, this Spiced Poached Pears with Mascarpone is about to become your new favorite. Everything is cooked to juicy, golden perfection with wholesome ingredients and incredible depth of flavor.
One simple tip!
Buy firm pears. A pear that gives slightly at the neck is perfect; one that gives everywhere will collapse into mush in the simmering syrup.
Step-by-Step Photos
Why You’ll Love This Recipe
Quick & EffortlessReady in just 43 minutes total with straightforward, foolproof prep.
Packed with Deep FlavorCarefully balanced with Bosc pears, granulated sugar, water for maximum satisfaction.
Family & Crowd FriendlyMakes 4 generous servings that can be effortlessly doubled or scaled using our smart scaler.
Nutritious & High ProteinProvides 5g protein and only 470 calories per serving.
Ingredients Notes & Variations
Here is an overview of what you will need for this recipe. Be sure to scroll down to the printable recipe card below for exact scaled measurements!
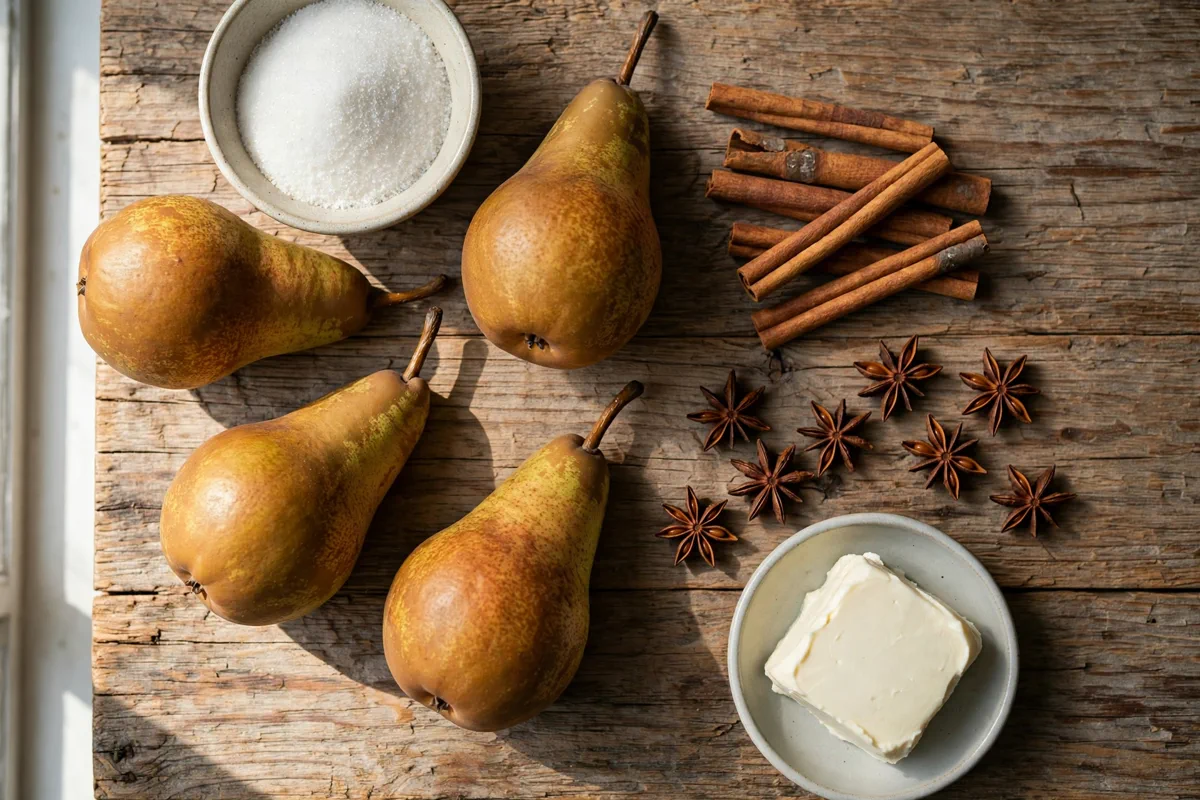
Bosc pears
4 piecefirm-ripe, peeled, halved, and cored
granulated sugar
0.75 cupfor the poaching syrup
water
4 cupfor the poaching syrup
cinnamon sticks
2 piecewhole sticks, not ground
star anise
3 piecewhole pods
mascarpone
8 ozsoftened 20 minutes at room temperature
How to Make (Step-by-Step Overview)
Here is a quick summary of the preparation process. Detailed cooking temperatures and step timers are included in the recipe card below.
1
Combine the water, sugar, cinnamon sticks, and star anise in a medium saucepan. Set over medium heat and stir until the sugar dissolves fully.
Look for: Stir once and look for crystals along the pan's edge. The liquid should be completely clear.
2
While the syrup warms, peel the pears. Halve them lengthwise through the stem, then scoop out the cores and the thin line of seeds with a melon baller or small spoon. Leave the stems on if you want the pretty look.
Look for: A firm pear resists the peeler just slightly. That resistance is exactly what you want.
3
Bring the syrup to a gentle simmer, then lower the pears in cut-side down. Cut a round of parchment paper to fit the pan and lay it on the fruit so every piece stays submerged.
Look for: The syrup should barely tremble — a few lazy bubbles, never a rolling boil.
4
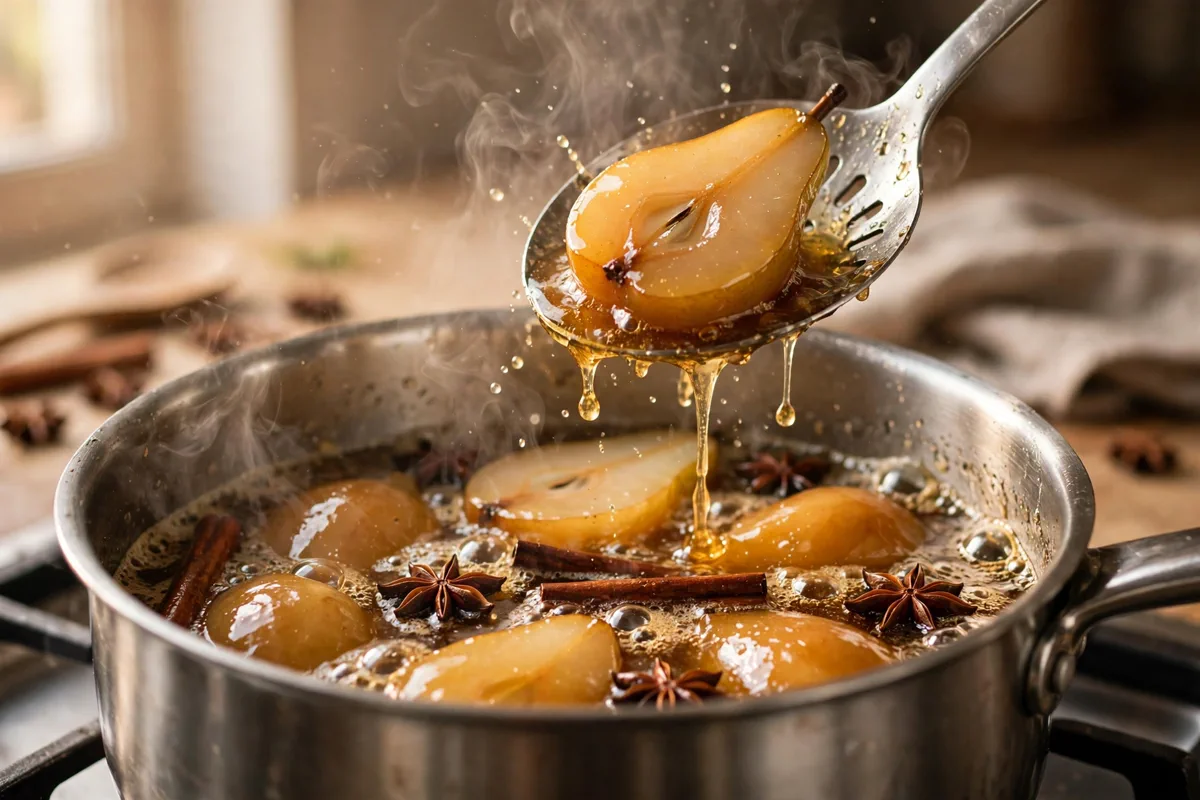
Simmer until a thin knife slides into the thickest part of a pear with only slight resistance, 15 to 20 minutes. Lift the pears out with a slotted spoon and set them on a plate.
Look for: Look at the pears where they were cut. The flesh near the edges turns glassy and translucent when it is done.
5
Raise the heat and boil the syrup until it thickens enough to coat the back of a spoon, 8 to 10 minutes. Fish out the cinnamon sticks and star anise.
Look for: Dip a spoon in and draw a line across the back of it with your finger. The syrup is ready when the line holds for a second before closing.
6
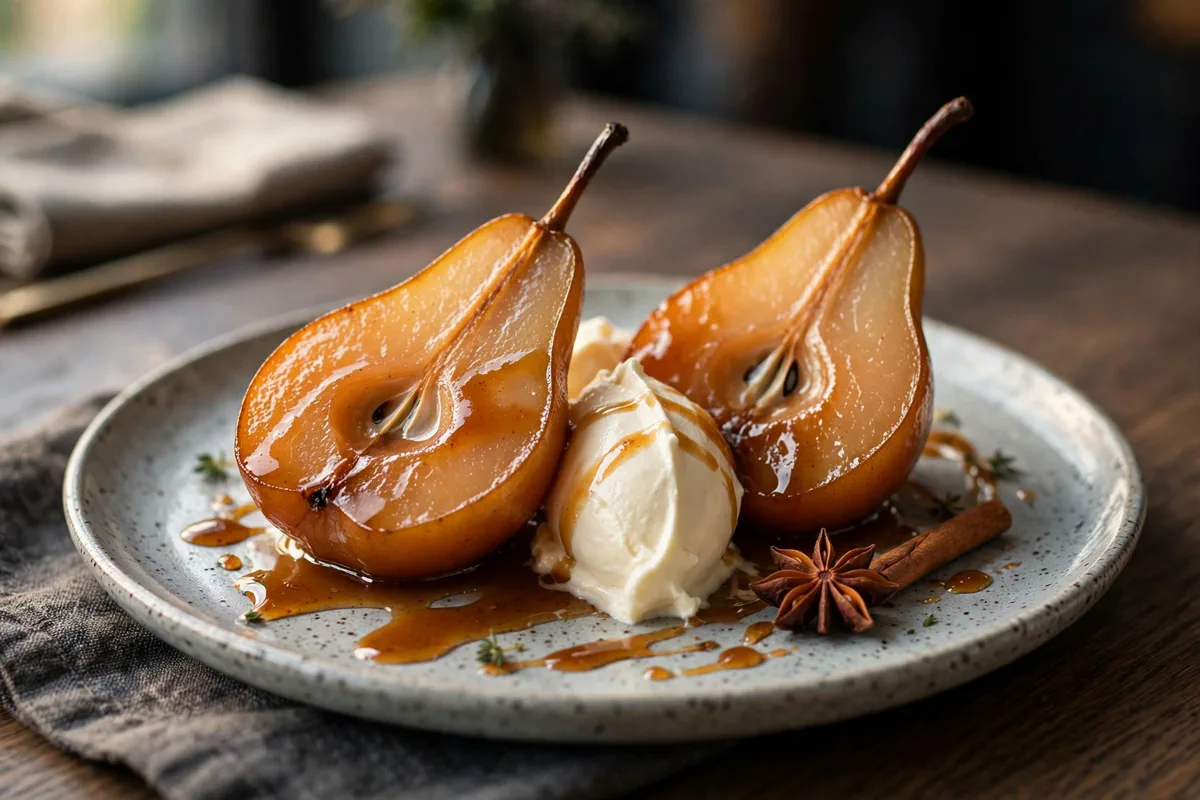
Place two pear halves on each plate, spoon a generous dollop of mascarpone alongside, and drizzle over the warm reduced syrup.
Look for: Serve while the syrup is warm enough to steam faintly. The contrast of warm pears, warm syrup, and cool mascarpone is the whole point.
Our Pro Tips for Success
- •Buy firm pears. A pear that gives slightly at the neck is perfect; one that gives everywhere will collapse into mush in the simmering syrup.
- •Do not skip the parchment. Pears float. The parts that bob above the surface cook slower and turn brown while the submerged parts go soft.
- •Taste the syrup before the pears go in. It should taste a little too sweet. The pears release juice as they poach and dilute it, so a syrup that tastes right at the start ends up thin and bland.
- •Reduce the syrup only after the pears come out. Boiling it down with the fruit still in the pan overcooks the pears in minutes.
- •Set the mascarpone out 20 minutes before serving. Cold, straight-from-the-fridge mascarpone is stiff and cold against warm pears; slightly softened, it drapes over them the way it should.
Storage & Make-Ahead Instructions
Refrigerator:Store leftovers in an airtight container for up to 3 to 4 days.
Freezer:Freeze in freezer-safe containers or bags for up to 2 months. Thaw overnight in the fridge.
Reheating:Reheat gently in a 350°F oven or covered skillet with a splash of broth until heated through.
Interactive Kitchen Assistant Live Smart Scaler
Our Recipe Precision Calculators
Calculate exact roasting times, internal temperatures, brining ratios, and safe thaw windows.
2.5 lbs (1.13 kg)
Recommended Timing & Thermals
Est. Cook Time45 mins
Rest Period7 mins
Pull From Heat160°F (71°C)
Final Carryover165°F (74°C)
Insert meat thermometer into thickest center without touching bone for 100% juicy safety.
What Spiced Poached Pears Are
Spiced poached pears with mascarpone is exactly what the name says: firm pears simmered gently in a sweet syrup flavored with cinnamon and star anise, served with a spoonful of cool mascarpone and a drizzle of the reduced syrup. Five ingredients, one saucepan, and a dessert that looks like it took all afternoon when it took about forty minutes.
This is the dessert we make when guests are coming and there is no time for pastry. The pears do all the visual work. They come out glossy and amber, and the warm syrup poured over cold mascarpone reads as restaurant technique even though the hardest part is peeling four pears.
Why Poaching Suits Pears So Well
Pears are tricky fruit for baking. Their flesh is dense and their flavor is delicate, so an oven often gives you a pear that is raw in the middle and collapsing at the edges. Poaching solves both problems at once. The syrup surrounds the fruit completely, so heat reaches it evenly, and the gentle simmer never gets violent enough to tear the flesh apart.
Bosc pears are built for this. Their flesh is firm and fine-grained, which means they can sit in hot syrup for twenty minutes and still hold a clean halved shape. Softer pears, like Comice, give up long before the syrup has flavored them, and you end up with pear soup. Firmness at the store is a feature here, not a flaw. If the pears give only slightly at the neck and smell sweet, they are ready.
The shape of a halved pear helps too. Halving doubles the surface area the syrup can touch, and scooping out the core removes the only part of the pear that stays hard and bitter. Leave the stem on when you halve them. It does nothing for the flavor and everything for the plate.
The Five Ingredients, and Why Each Earns Its Place
Five ingredients is not a gimmick here. There is nowhere to hide in a poached dessert, so every one of them has a job.
- Pears are the structure and the flavor. Everything else exists to make them taste more like themselves.
- Sugar makes the syrup. Three quarters of a cup in four cups of water sounds like a lot, but the syrup needs to be sweet enough to season the pears and to reduce into a pouring sauce afterward.
- Cinnamon sticks bring warmth without the muddy look of ground spice. Ground cinnamon would cloud the syrup; whole sticks infuse it and come out clean.
- Star anise is the flavor people ask about. It is licorice-adjacent, but in the syrup it reads as warm and slightly exotic rather than candy-like. Three pods is the right amount for this quantity of syrup.
- Mascarpone is the cool, rich contrast. It has the richness of cream cheese with none of the tang, so it lets the spiced syrup stay in charge of the flavor.
Water is the sixth thing in the pan, and we do not count it. Nobody counts water.
How the Poaching Liquid Does the Work
The syrup has two phases. In the first, it is a cooking medium: sweet, spiced, and thin enough to circulate around the pears. In the second, after the pears come out, it becomes a sauce. Keeping those phases separate is the single most important technique in this recipe.
Start by dissolving the sugar completely before the pears go in. Undissolved sugar can crystallize on the fruit and leave gritty patches. Then taste the syrup. It should taste a little too sweet. That is correct. The pears release a surprising amount of juice as they poach, and that juice dilutes the syrup. A syrup that tastes right at the start finishes thin and bland.
Read the Syrup, Not Just the Clock
Eighteen minutes is a guideline, not a law. Pears vary. The doneness test that never fails is the knife test: push a thin knife into the thickest part of a pear half. It should slide in with slight resistance, like room-temperature butter. If it slides in with no resistance at all, the pear is overdone, so check a minute or two early.
There is a visual cue too. Raw pear flesh is opaque and white. As it poaches, the flesh near the cut edges turns glassy and translucent. When that translucency has crept about halfway to the center, the pear is done. It will carry over slightly as it sits.
After the pears come out, the syrup gets its second life. Boil it down until it coats the back of a spoon. You are looking for a thin, pourable glaze, not jam. It will thicken a little more as it cools, so pull it off the heat one stage before it looks perfect.
The Parchment Trick
Pears float. It is a small, annoying fact that ruins otherwise good poaching. The halves that bob above the surface cook slower than the submerged ones, and the exposed tops brown in the air while the rest stays pale. A round of parchment paper cut to fit the pan, laid directly on the fruit, solves it. The parchment keeps every piece under the surface without pressing down on them.
Do not substitute the lid for the parchment. A lid traps steam and raises the temperature, which pushes the simmer toward a boil. The parchment keeps the pears down and lets steam escape. It takes thirty seconds to cut and it changes the result.
Warm or Cold: How to Serve Them
Our favorite way is warm pears, warm syrup, cool mascarpone. The temperature contrast is the best part of the dish: the mascarpone softens against the warm fruit but does not melt into a puddle, and the cold cream makes the spices taste brighter.
Cold works too, and it is the better option if you are making this ahead. Poached pears keep beautifully in their syrup in the fridge, and served cold with a quenelle of mascarpone they eat like a composed restaurant dessert. What you should not do is serve the pears at a lukewarm middle temperature. Lukewarm dulls both the spice and the cream. Commit to warm or commit to cold.
One serving note: two halves per person looks generous on the plate and matches the recipe exactly, since four pears give eight halves. Arrange them cut-side up so the syrup pools in the hollow where the core was. That little pool of syrup is not an accident.
What Usually Goes Wrong
Mushy pears. The cause is almost always a full boil instead of a simmer, or pears that were too ripe to begin with. Keep the heat at a bare tremble. If your burner runs hot, slide the pan half off the heat.
Raw centers. This happens when the pears are very large or the simmer is too timid. If the knife meets real resistance after twenty minutes, give them five more and check again. Big pears just need more time.
Thin, bland syrup. Either the syrup was not sweet enough at the start, or it was not reduced enough at the end. Remember both fixes: taste for too-sweet before poaching, and reduce until it coats a spoon after.
Mascarpone puddle. The pears were too hot, or the mascarpone went on first and sat. Plate the pears, let them steam off for a minute, then add the mascarpone and the syrup.
Spices that vanished. Old spices lose their punch fast. If your star anise has been in the cupboard for two years, it is decoration, not flavor. Buy a small fresh bag; you need three pods.
Making Them Ahead
Poached pears are one of the rare desserts that improve with a night in the fridge. The syrup keeps seasoning the fruit, and the color deepens to a richer amber. Poach them up to two days ahead, cool them in the syrup, and refrigerate everything together in a covered container.
To serve warm, lift the pears out, warm them gently in a little of the syrup over low heat for about eight minutes, and reduce the rest of the syrup separately. Add the mascarpone only at the moment of serving, never in advance. The syrup on its own keeps for a week in the fridge and is excellent over yogurt or vanilla ice cream, which is a fine way to use the leftovers if you deliberately make extra.
Frequently Asked Questions
Easy Chicken Recipes • Official Card
Spiced Poached Pears with Mascarpone
☆☆☆☆☆0.0 (0 reviews)•Recipe by Cooking With Guru Editorial Team•Updated: Oct 21, 2026
Tender pears simmered in cinnamon-star anise syrup with cool mascarpone — a five-ingredient dessert that looks like it took all afternoon.
Prep Time15 mins
Cook Time28 mins
Total Time43 mins
Calories470 kcal
Adjust Servings:
4
Ingredients
Click to check off4 piece Bosc pears(firm-ripe, peeled, halved, and cored)
3/4 cup granulated sugar(for the poaching syrup)
4 cups water(for the poaching syrup)
2 piece cinnamon sticks(whole sticks, not ground)
3 piece star anise(whole pods)
8 oz mascarpone(softened 20 minutes at room temperature)
Equipment Needed
- medium saucepan with lid
- vegetable peeler
- sharp knife
- melon baller or small spoon
- parchment paper
- slotted spoon
Instructions
Step-by-StepCombine the water, sugar, cinnamon sticks, and star anise in a medium saucepan. Set over medium heat and stir until the sugar dissolves fully.
While the syrup warms, peel the pears. Halve them lengthwise through the stem, then scoop out the cores and the thin line of seeds with a melon baller or small spoon. Leave the stems on if you want the pretty look.
Bring the syrup to a gentle simmer, then lower the pears in cut-side down. Cut a round of parchment paper to fit the pan and lay it on the fruit so every piece stays submerged.
Simmer until a thin knife slides into the thickest part of a pear with only slight resistance, 15 to 20 minutes. Lift the pears out with a slotted spoon and set them on a plate.
Raise the heat and boil the syrup until it thickens enough to coat the back of a spoon, 8 to 10 minutes. Fish out the cinnamon sticks and star anise.
Place two pear halves on each plate, spoon a generous dollop of mascarpone alongside, and drizzle over the warm reduced syrup.
Nutrition Facts (per serving)
Calories470 kcal
Protein5g
Carbs54g
Fat24g
Fiber6g
Sugar40g
Sodium45mg
CWG
Recipe Source
The Cooking With Guru Team
Our recipes are developed and checked by the Cooking With Guru team. Nutrition figures are estimates calculated from USDA data, and yields scale with the built-in portion tools so the recipe fits your kitchen.
More dessert recipes to try!
🍽️
Turkish Menemen: One-Pan Eggs in Spicy Tomato Sauce
🍽️
High-Protein Cottage Cheese Egg Bake with Spinach
🍽️
Easy Chicken Congee Recipe with Crispy Garlic and Chili Oil
Comments & Questions (0)
Join the conversationNo comments yet!
Be the first to leave a comment or ask a question about Spiced Poached Pears with Mascarpone.


